A WordPress Multilingual Website context-sensitive information characteristic of languages(using the language translation strings- not google translate) can automatically redirect users to the region-specific language, or we can select our preferred language using a dropdown menu which we will discuss further.
1. Pick out the best WordPress Multilingual Plugin
There are a bunch of plugins available to translate our WordPress website. But we need to choose a plugin that easily handles translations without making it difficult. So in this article, we’ll look at two FREE plugins with step-by-step instructions on how to create a multi-language WordPress website with the following plugins called:
2. Using GTranslate translation services
GTranslate is one of the more popular WordPress Multilingual translation plugins. It translates everything from the website ie: posts, pages, categories, and tags. We can do this with two easy steps.
- Install the GTranslate plugin in WordPress.
- Add the translate option to your website.
Step 01 – Install the GTranslate plugin in WordPress.
To Install the plugin go to WordPress Dashboard and go to Plugins then click “Add New” here your search for a plugin named “GTranslate” like the below screenshot.
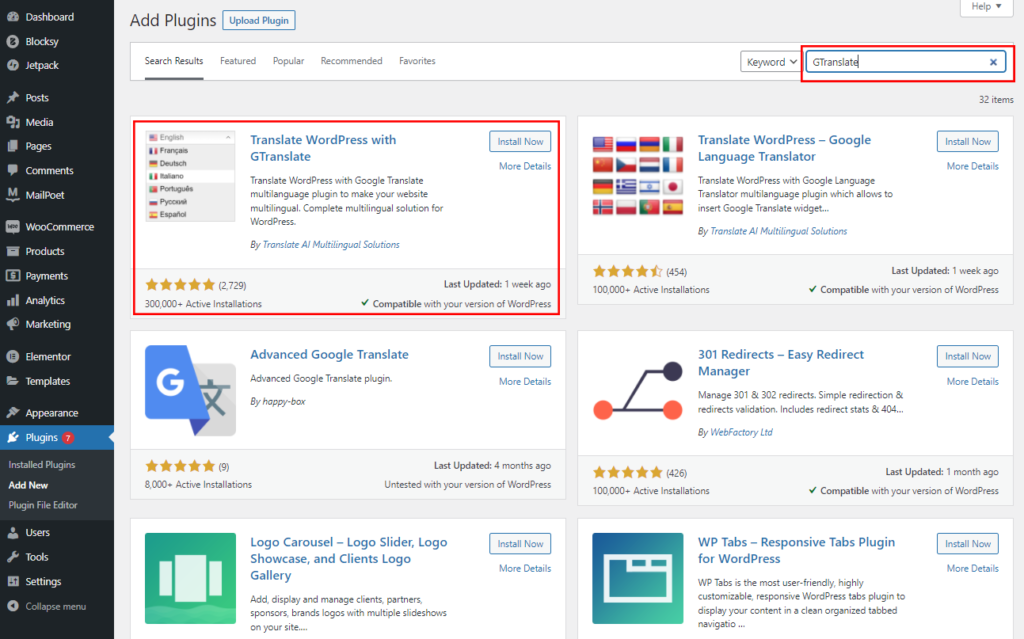
Install the plugin and click “Activate.” Now, we have successfully installed the GTranslate plugin in WordPress then you will see the setting option like below.

Step 02 – Add the translate option to our website.
To add the translate option-click the “Settings” and select the languages in which we want our users to view our website content like the below.
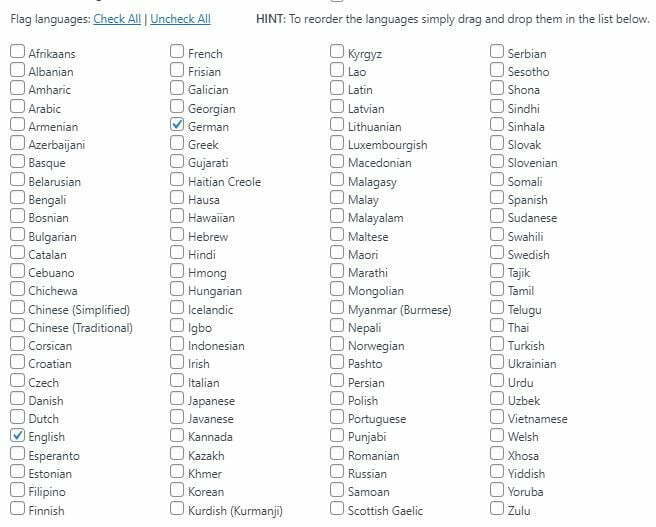
Once we have selected the languages, Next we need to choose where we want to display the translation option on our WordPress Multilingual website. To choose that click the “Show in menu” dropdown option if you want to show the translate option on your menu choose Primary Menu and click “Save Changes” that’s it.
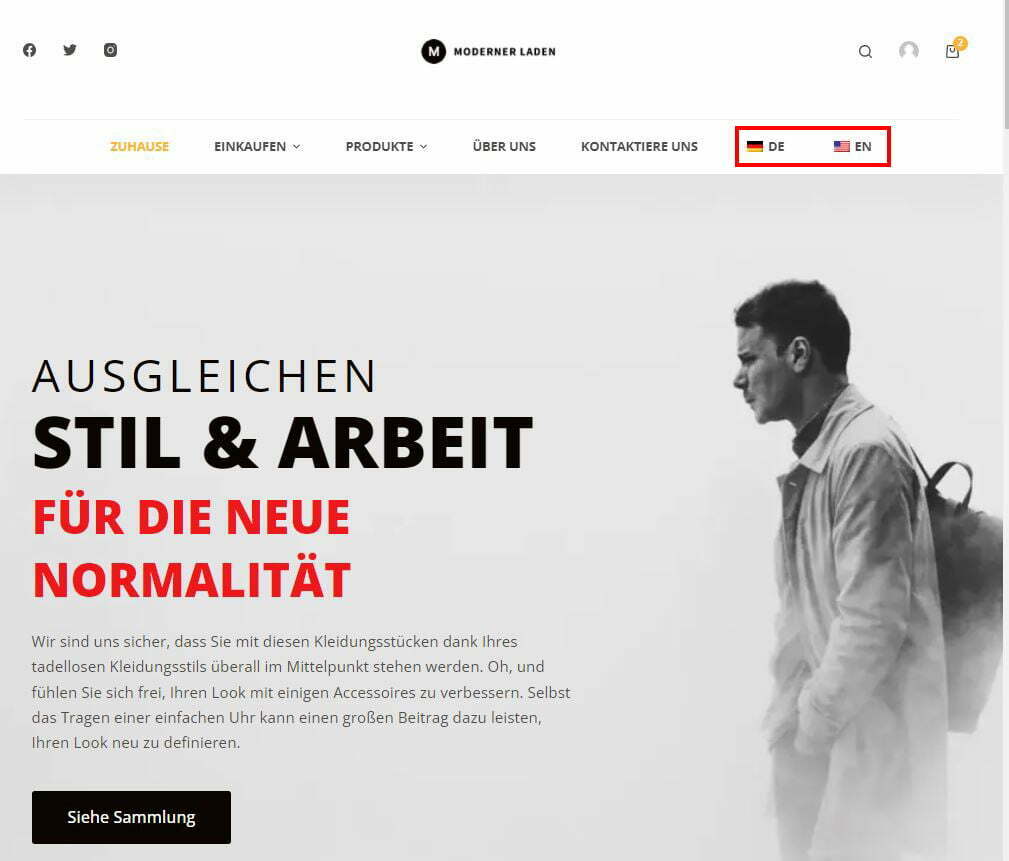
Now you can see the below screenshot with 2 Languages English & Spanish side by side. We can add multiple languages as we want to use the steps shown above.

Now we know how to make our WordPress Multilingual website. But what if a person reaches from a different country/Language ie: Spanish But our Website’s default language is English, so we need to auto-select the user preferred language instead of making the user select the language manually. Let’s see how we can translate our website automatically to the user’s browser language. To do that you can head over to the GTranslate Plugin settings and Check the ✅ Auto switch to browser language:
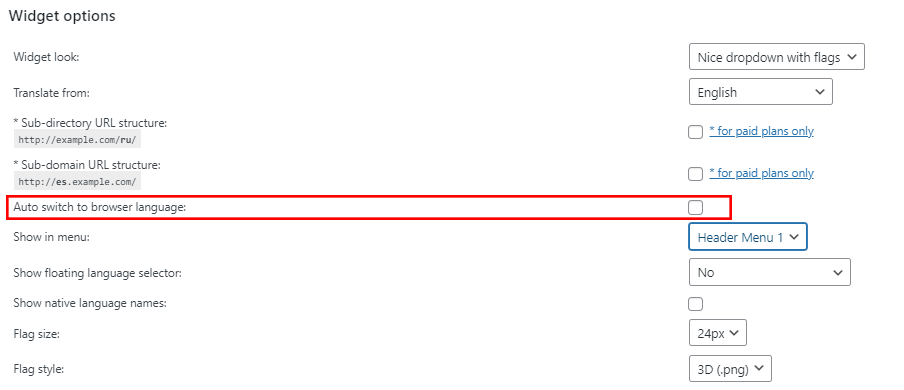
Now users can see the website in their default browser language.
Keep in mind that google translations are usually less accurate than human translation so this can lead to our content getting lost in translation. So better way is to translate our content manually using TranslatePress.
3. Using Language Translation Strings (TranslatePress)
For this method, we can see how to use the TranslatePress plugin to translate multiple types of content from our website. To do that, go to the WordPress Dashboard > Plugins > Add New search “TranslatePress” as shown in the screenshot below.
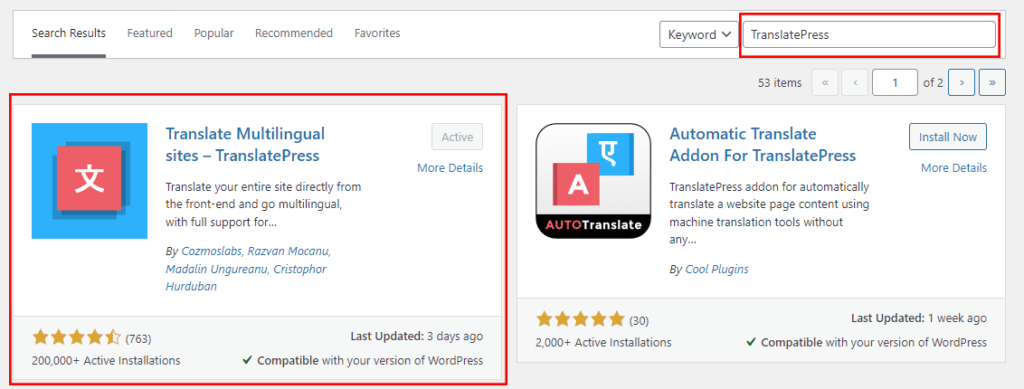
Install the plugin and click “Activate.” Now, we have successfully installed the plugin in WordPress. You will now see the TranslatePress option in the dashboard setting like below.
Please note that this plugin is a FREE version so it’s restricted to exclusively one translation language. If you need multiple languages, please refer TranslatePresswebsite for pricing and Language Addons.
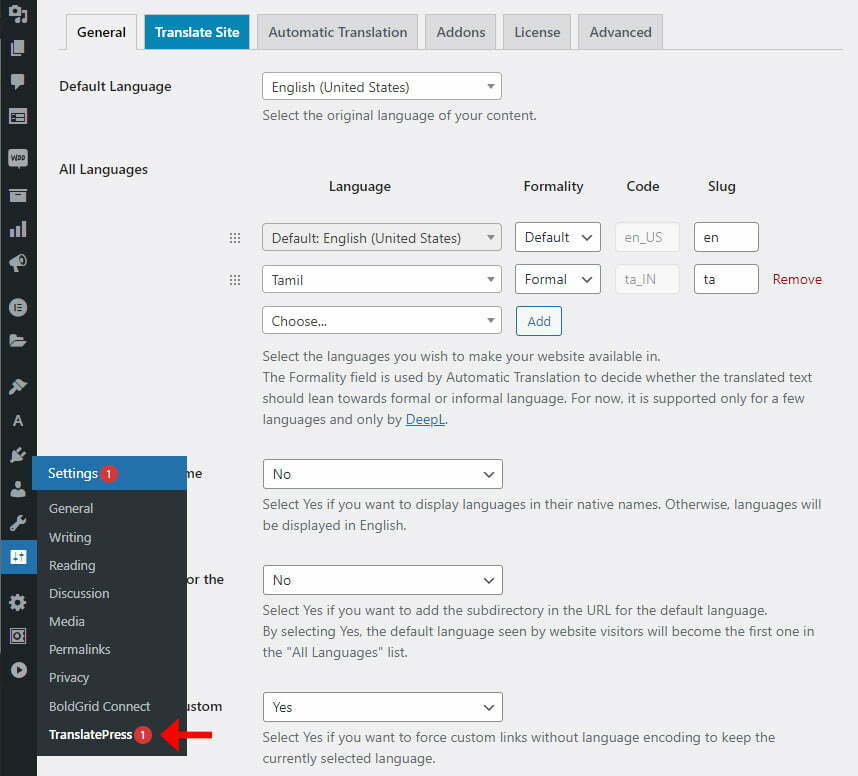
Adding language to our website go to the TranslatePress option from the Dashboard Setting then click the “Translate Site” tab then choose your specific language from the dropdown like below. If your website content is in a different language choose your language first from the “Default Language” dropdown ie: If your default website content is in Spanish select the Spanish language by default.

After adding your language click “Save Changes” from the bottom of the page. Now you can see the “Translate Page” option on top of the page.

Next, we will see how to translate our website content using Language Translation Strings. To do that click the “Translate Page” button on top of the admin bar section and it will open the live translation editor window like the below screenshot.
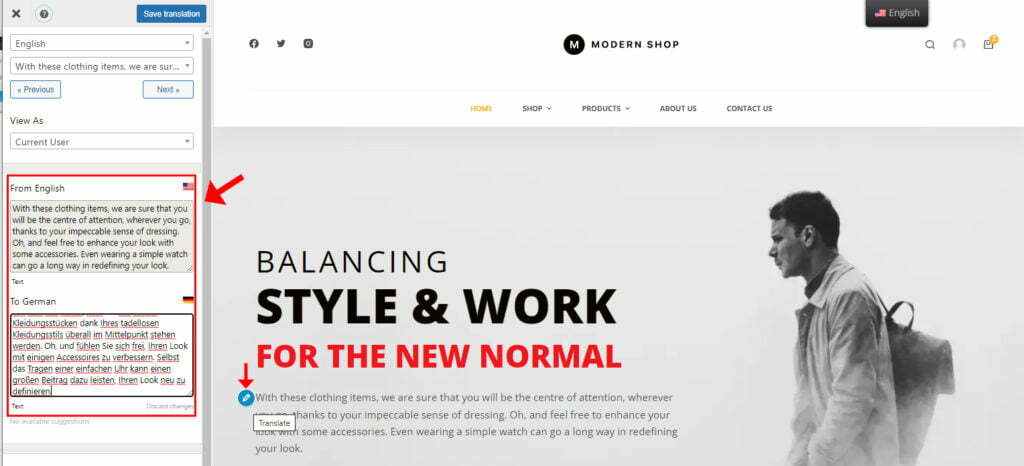
Now we will start the translation process by hovering over the text we want to translate. Click the pencil icon which I showed in the above screenshot and start the translation. In this example, we translated Logo, Navigation, and banner section content. This way, we can translate all our content from our website, and when you’re complete click the “Save Translation” button on the top.
4. Adding Language Switcher to our Website
- For TranslatePress
- For GTranslate
First, Let’s see the TranslatePress option. Go to the TranslatePress plugin settings page where you will see the Floating Language Selection dropdown option at the bottom of the page as shown below.

Select the first dropdown. You will see the different options. Select the option according to your requirement. The second dropdown is just a theme. Choose between a Light and Dark theme. The last dropdown allows you to choose a position: Bottom Left, Bottom Right, Top Right, or Top Left. After doing all the changes click “Save Changes.” Now we can see our website to see the Floating Language Switcher at the top of the page like the below screenshot.
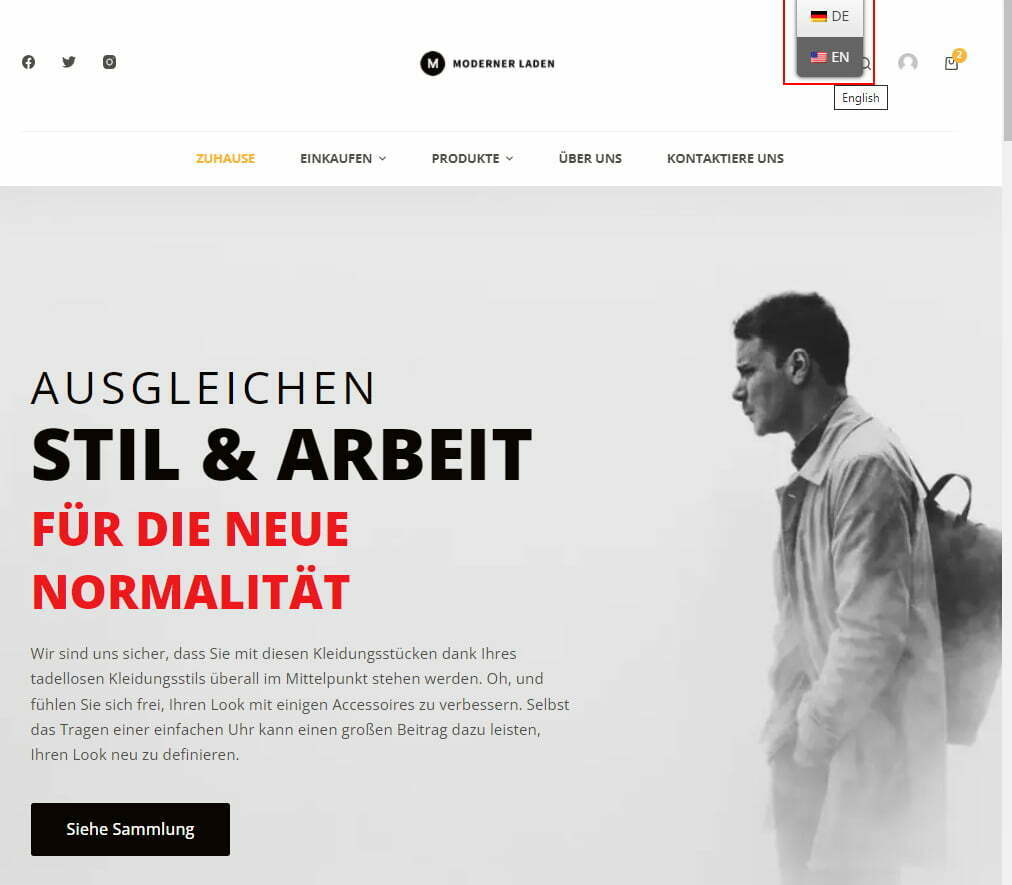
Now we will see how to add in our Navigation Menu in the GTranslate Option. To do that head over to the GTranslate Plugin settings here you will see “Widget Options” then choose the “Show in Menu” dropdown menu and select Primary Menu.
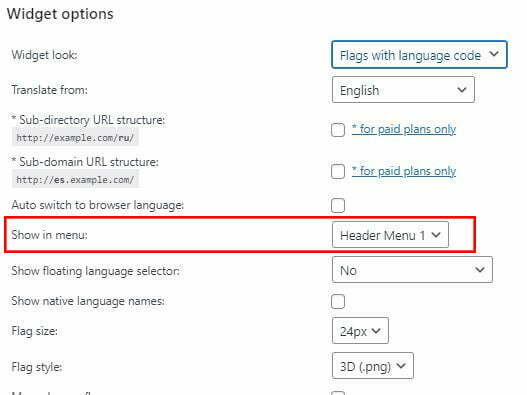
Once you added the Language Switcher in the Navigation Menu click “Save Changes” that’s it. Finally, we can check if our WordPress Multilingual enabled on our website.
5. Conclusion
Creating a WordPress Multilingual website can produce a great return on your investment when it comes to expanding your audience and reach is to provide your content in numerous languages. The more languages it is made available, the more people we can reach. You may also want to see our blog on How to Build a WordPress Website using Free Elementor Plugin and the Top 8 SEO Metrics you Need to Track to Move up on Rank.
To know more about SEO, CSS, Angular, Elementor, and other tech-related kinds of stuff visit our Blog.


