1. Introduction
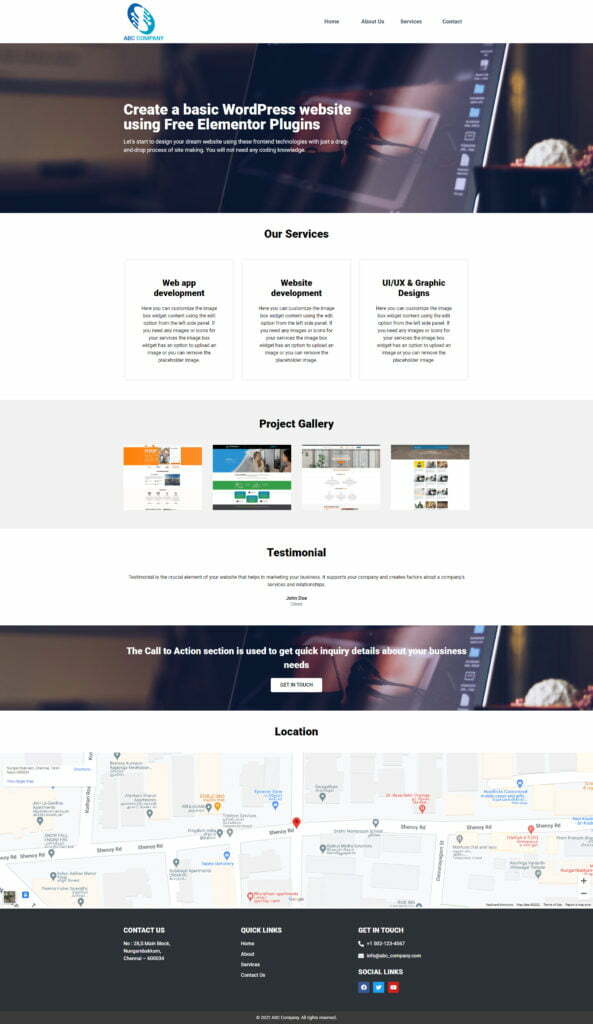
In this blog, we’ll see the whole process of creating a basic Elementor Website with WordPress using a free elementor website builder.
Let’s start to build the Best Elementor Website using these frontend technologies with just a drag-and-drop process of site making. You don’t need any coding knowledge.
2. Selecting the theme (to create best elementor websites)
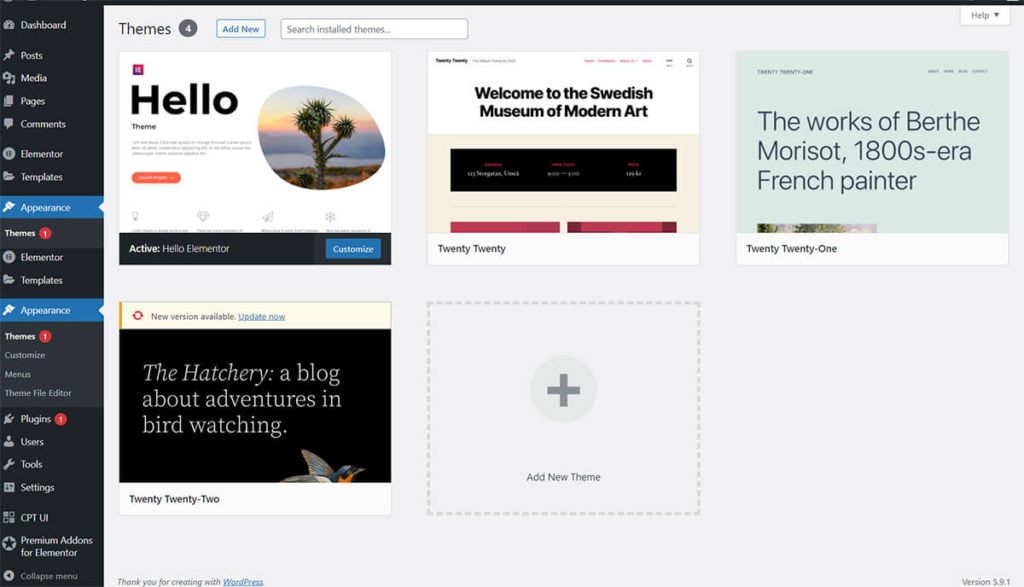
After completing the domain registration and WordPress installation, you need to select a suitable theme for your website. Now you can go and log in into your WordPress admin panel and click the Appearance → Themes in the admin panel nav items.
Now, you can select the WordPress theme. In this case, I am choosing the Hello Elementor theme (this theme is a barebone theme suitable for customizing the design using the Elementor plugin) and activating it.
3. Creating the Landing page
Go to the pages section for the admin nav menu and click on the “Add New” link.
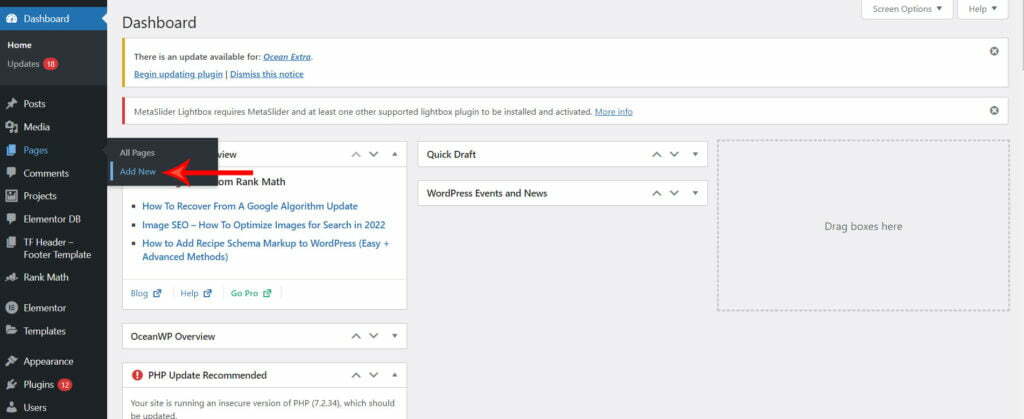
After clicking the add new link option it will create a new page and you can give the title as the page name. Here I have given the title name as “Home”. Next, you have to click the publish button to publish your page.
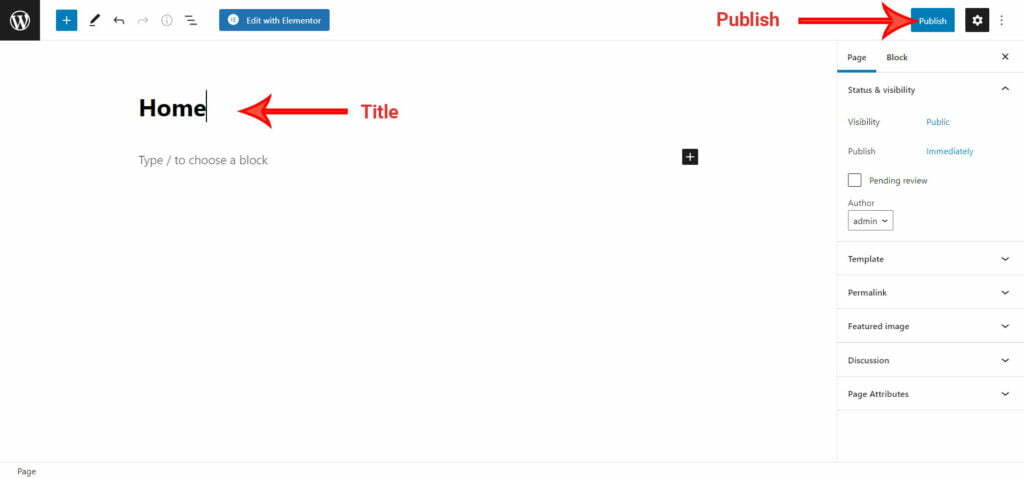
Now your page is published and pages will be added in the page list section.
4. Create a Header
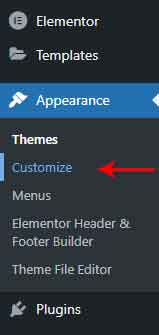
To create a header for all pages, go to the admin panel Appearance → Customize. Here we can set the site identity and menu for your website.
4.1) Create a Logo
To create a logo go to the admin panel under the Appearance click on “customize → Site Identity”.
here we can see the logo, site title, tagline, site icon option. Click on the logo section and upload your logo.
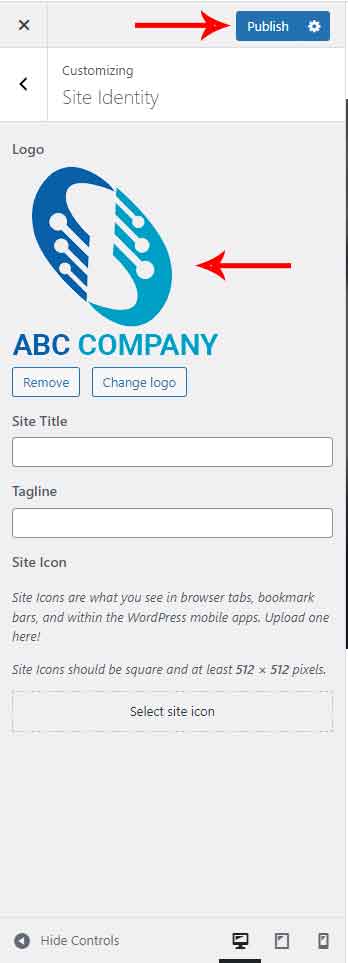
After uploading the logo image click on the “Publish” button. Now your logo has been uploaded.

4.2) Create Site Navigation
To create a header menu go to the admin panel “Appearance→Menu” and create the menu name in the menu structure field and click the “Create Menu” button. To create a header menu go to the admin panel “Appearance→Menu” and create the menu name in the menu structure field and click the “Create Menu” button.
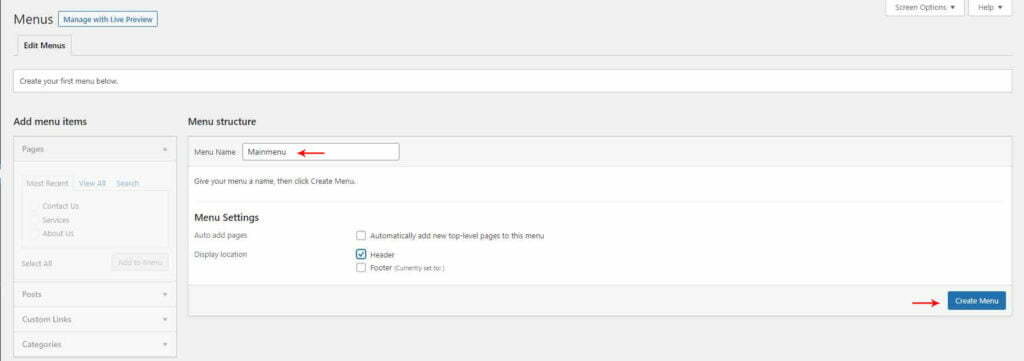
Next, create the menu item for the nav menu. We have already created some pages in the page section. Let’s add the pages into the menu item.
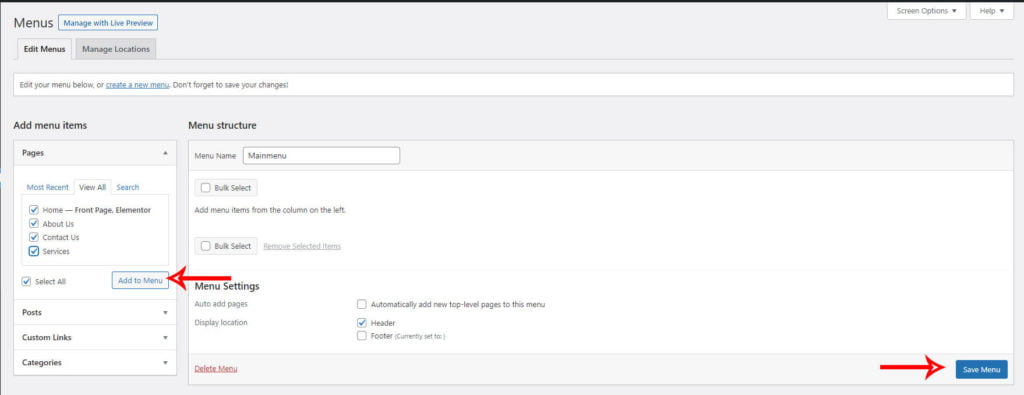
Select the checkbox in the view all tab and click on the “Add to Menu” button. Now the page name has been added to the menu item. Finally, click on the “Save Menu” button. Now the menu shows in your header section.
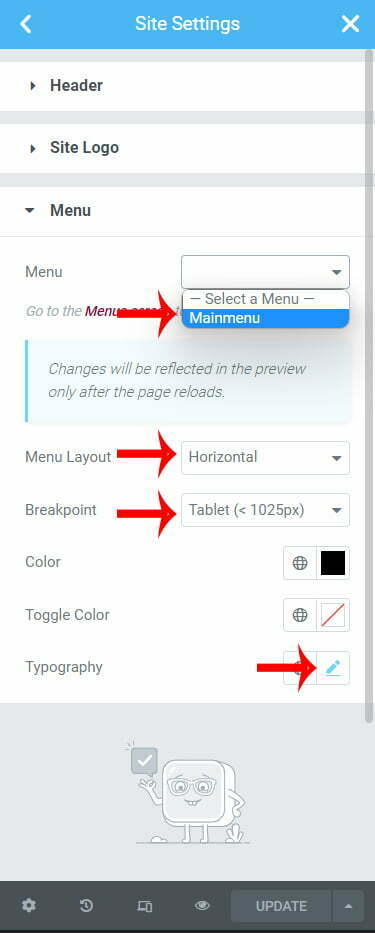
To customize the menu item font-color, font-family, font-size go to your Elementor Menu icon in the left panel under the Site Setting →Header→Menu.
Select the menu dropdown which you have already created in the menu structure field, select that menu name and customize the menu layout, add breakpoints, font color, size, and font family.
5. Create a body for your page
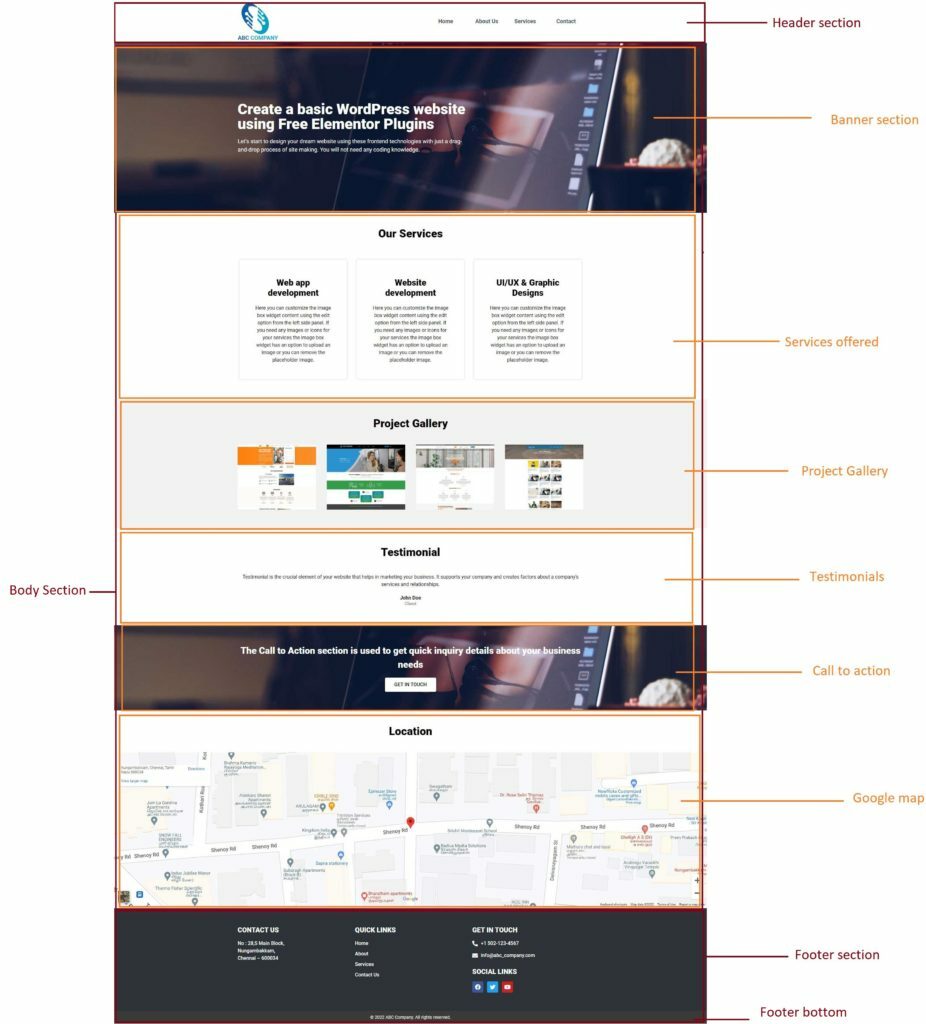
The body section is one of the important sections on the home page to describe short information about our working details, and what we are doing in our working process. let’s see with details with the following topics
5.1) Create Banner section
To create the banner image and set the width and height style of your home page. You can proceed to the background as a banner image of the home page. Elementor builder gives you user-friendly design tools to create a banner.
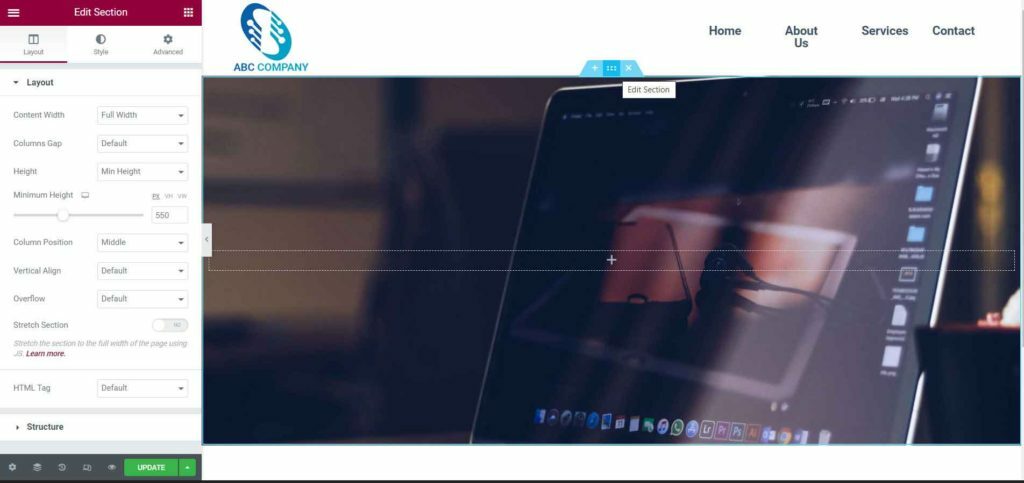
The background is one of the best elements of a webpage. Elementor builder allows you to choose the background images and set the banner width and height from the left side layout option. So here, I have set the banner content width as Full width and Min-height as 550PX.
Also, the elementor website builder allows changing the banner background position and size from the left side panel style option.
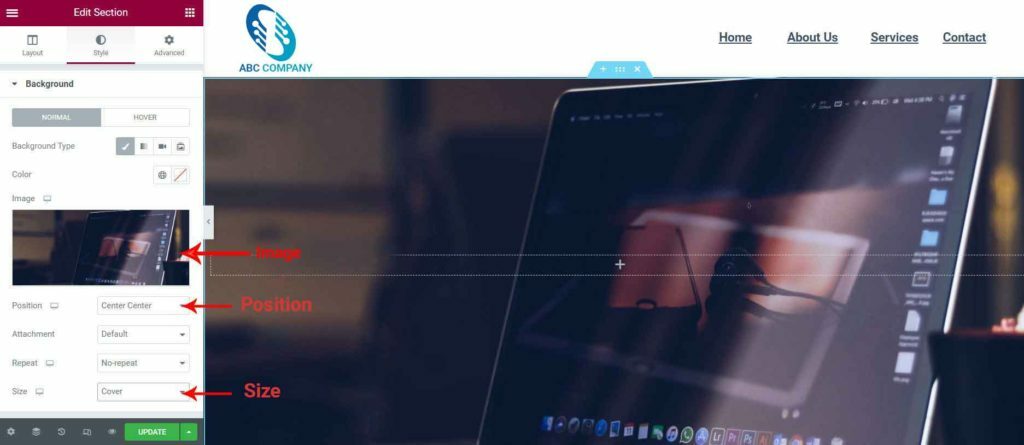
We can use Elementor builder to create a title and text over a background image. Hence, we can give the banner a title and a short description.
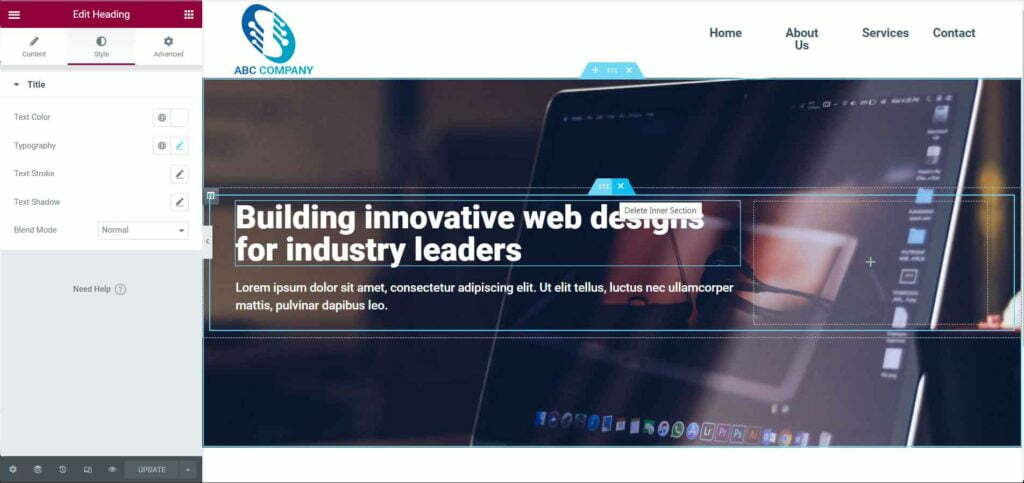
5.2) Services Offered
Now let’s start to build out our services content section of the home page. To create a new section, scroll down and click on the “Add Plus Icon”. For this, I will select the single layout structure.
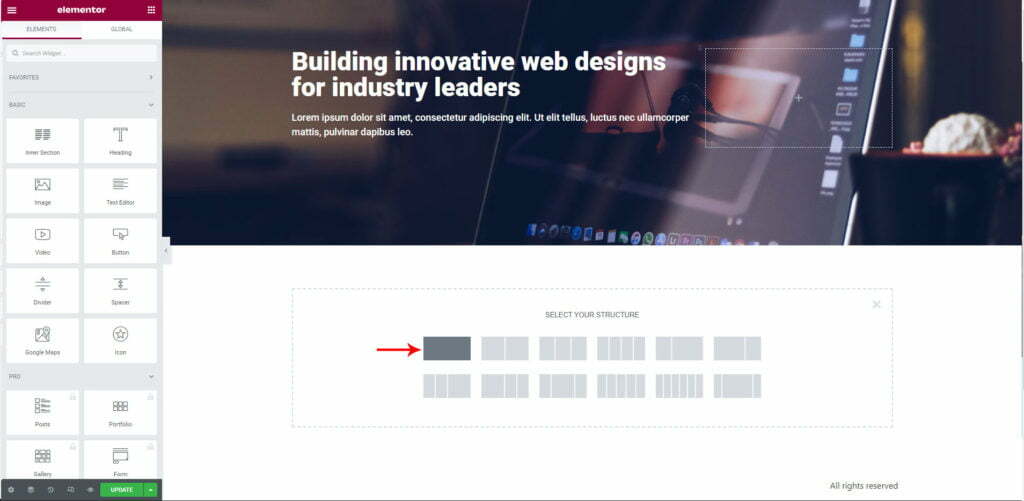
After creating the single layout structure, I have added some padding space for 50px for the top and bottom to the inner layout structure. Then let’s create the title for the content section using the Title Widget.
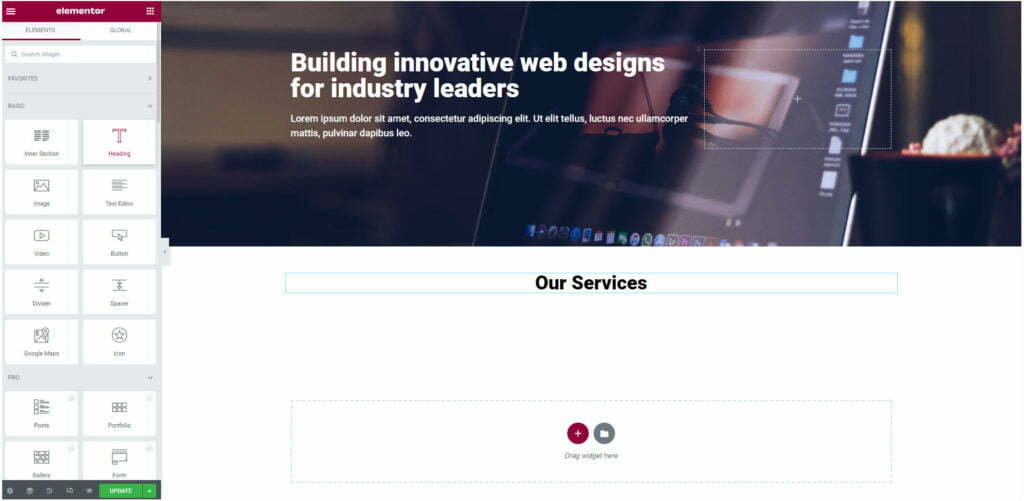
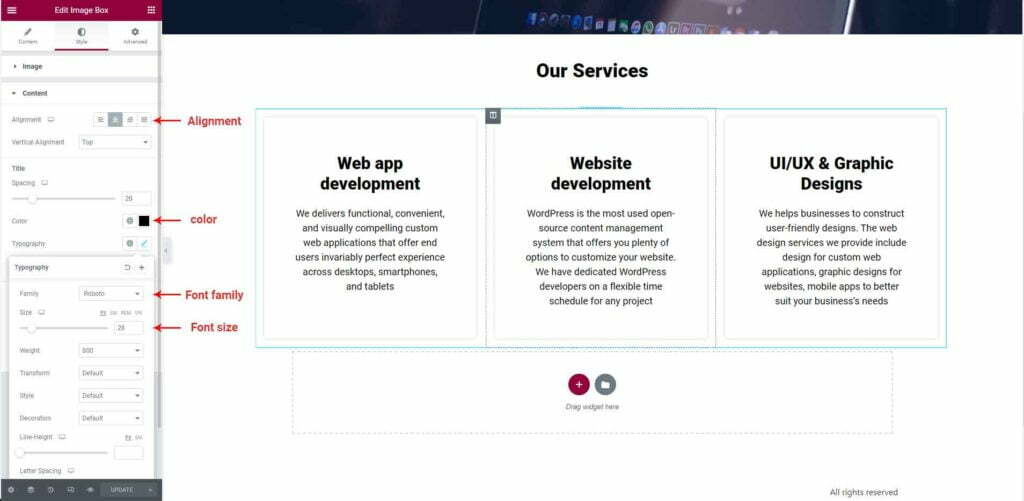
Elementor gives a very simple custom option for the titles. So you can edit the title Font size, Colour, Font Family, and Font-Weight as per your need from the left side style panel.

Now create three inner sections using the Inner Section Widget because we are going to add three types of services.
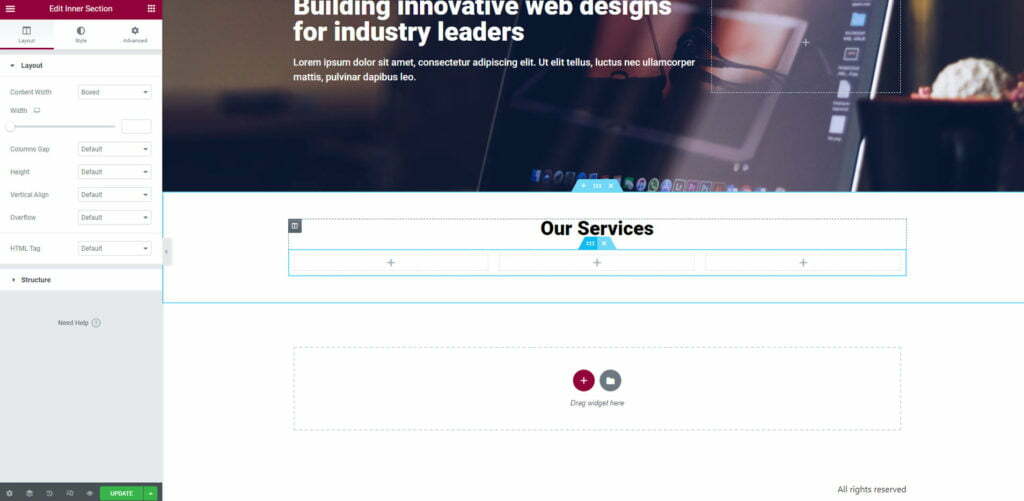
Now, add the service topic contents using the image-box Widget.
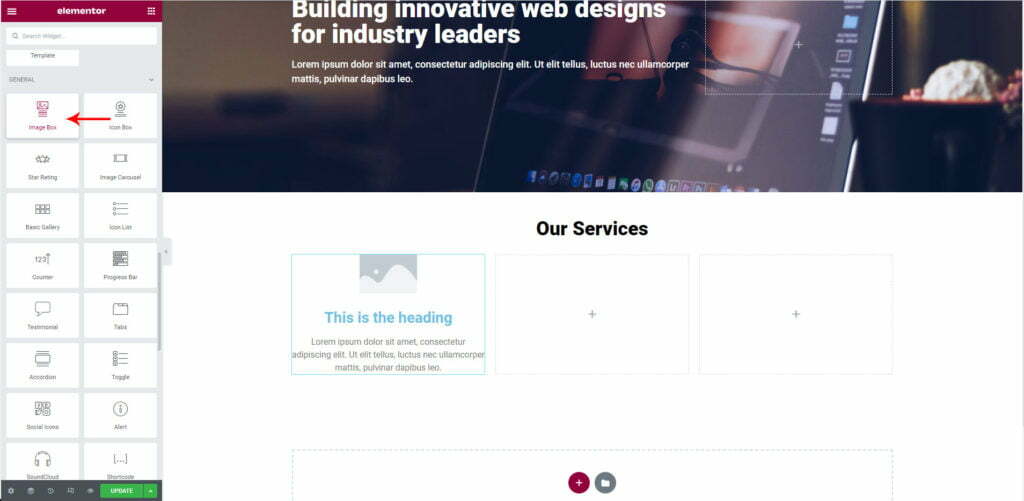
Here you can customize the image box widget content using the edit option from the left side panel. If you need any images or icons for your services the image box widget has an option to upload an image or you can remove the placeholder image.

5.3) Project Gallery
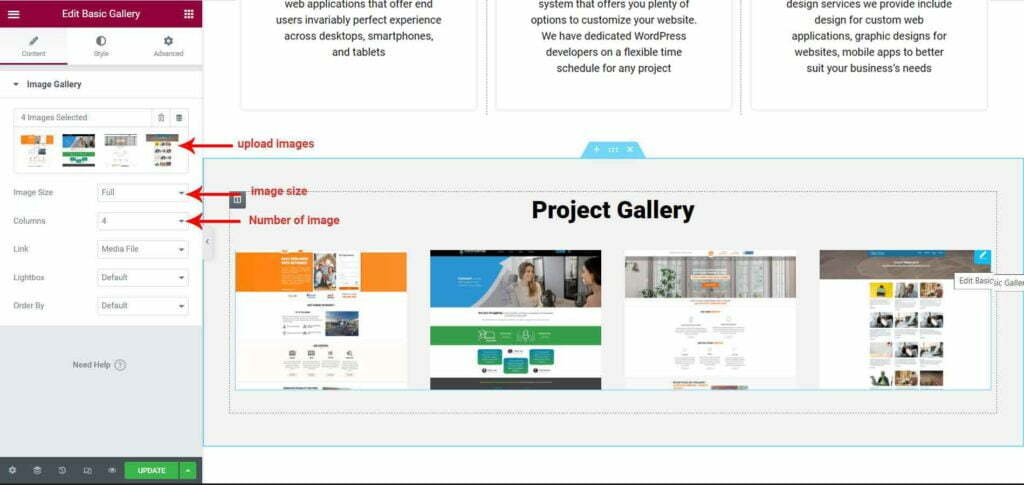
Next, we are going to create a gallery section for our projects. Elementor has a nice widget called Basic Gallery.
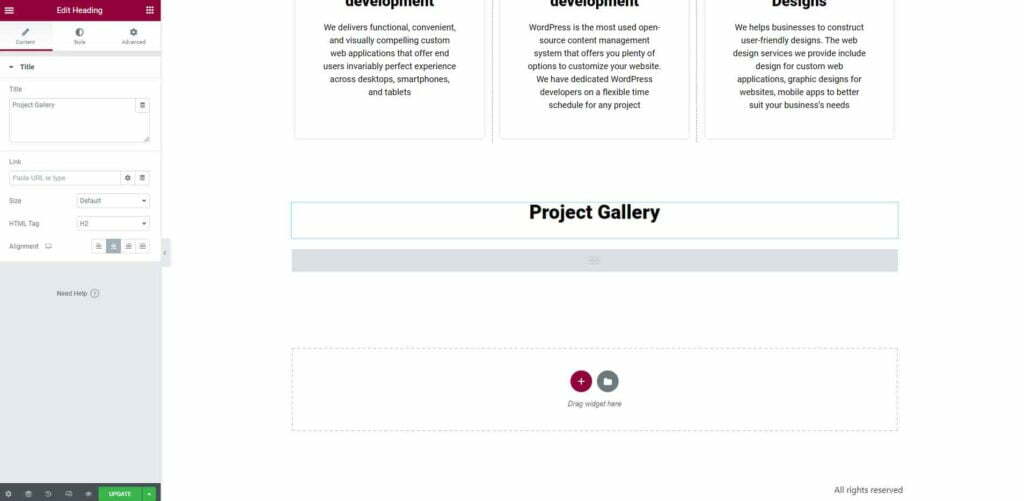
After creating the gallery title we are going to drag and drop the Basic Gallery Widget.
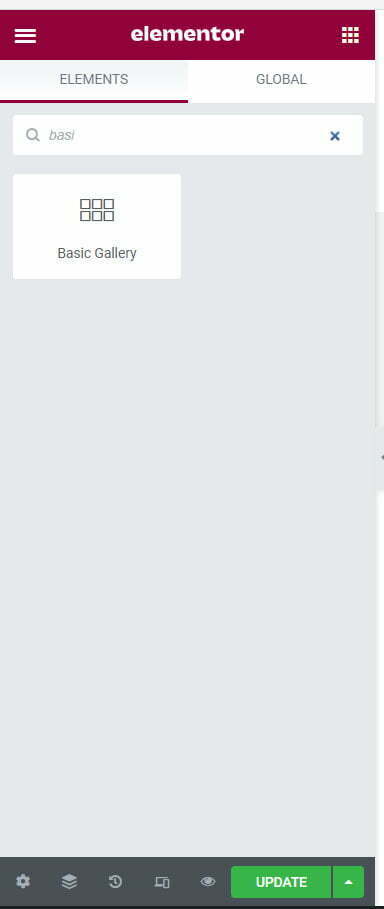
In the elementor, a basic gallery widget comes with uploading multiple images, and we can customize the image size, number of columns.
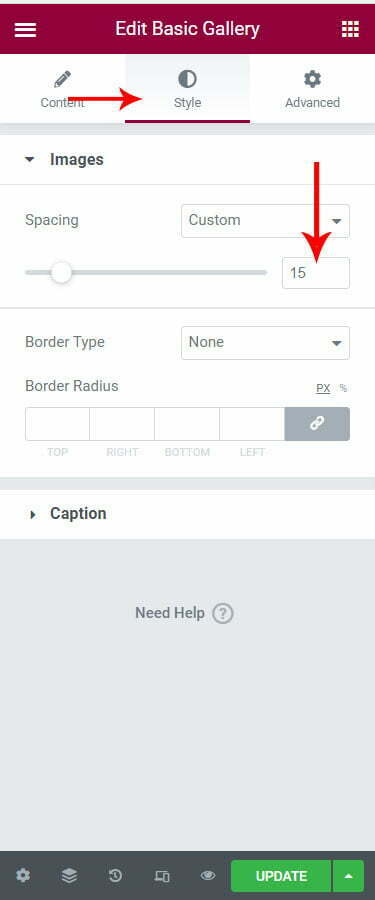
Also, we can change the space between the gallery images from the left side style tab.
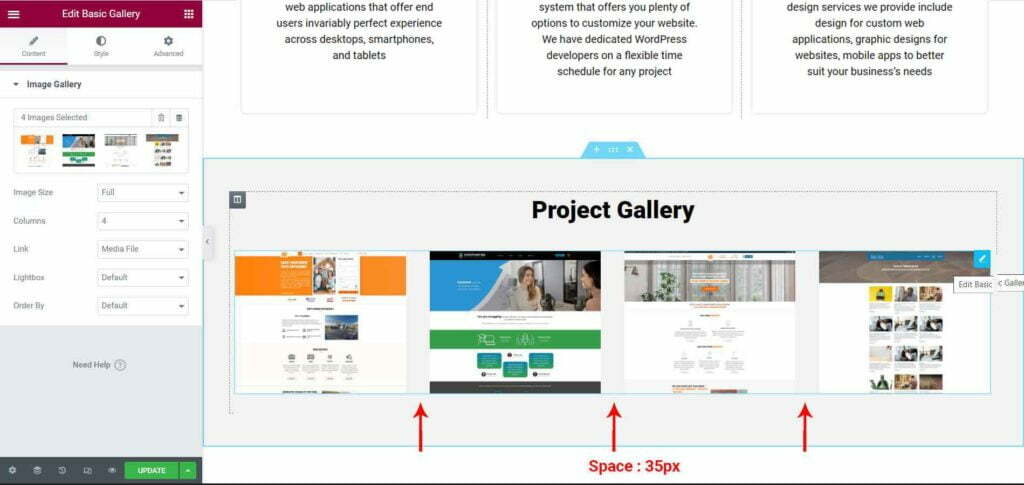
Here the image space is set between 35px. So the space helps to give a better look to the overall gallery.
5.4) Testimonials
Testimonial is the crucial element of your website that helps in marketing your business. It supports your company and creates factors about a company’s services and relationships.
Now create a single layout structure and drop the widget.
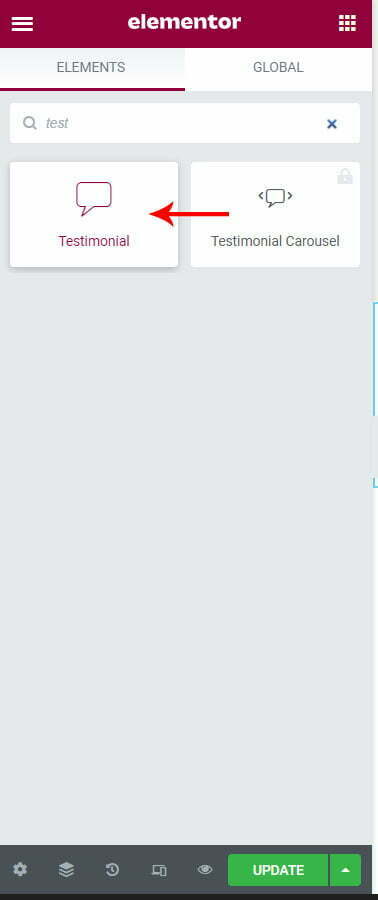
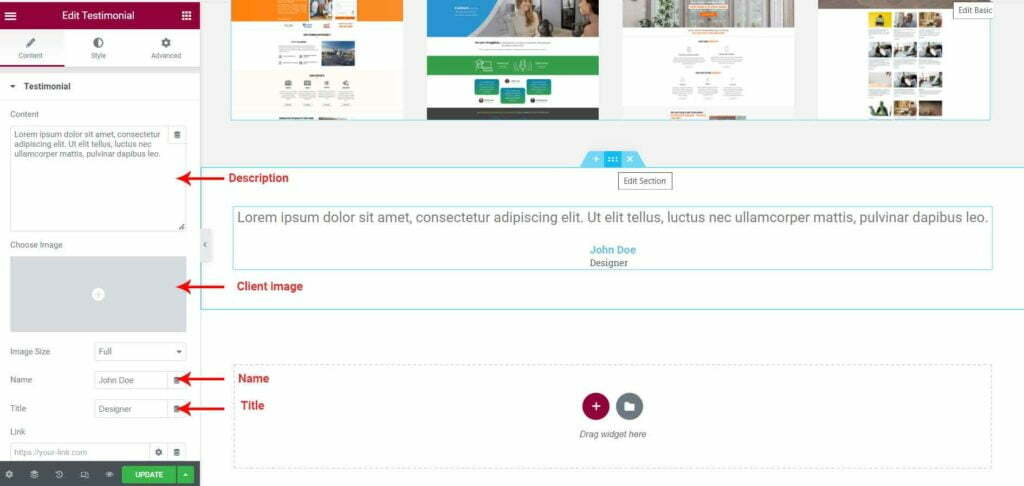
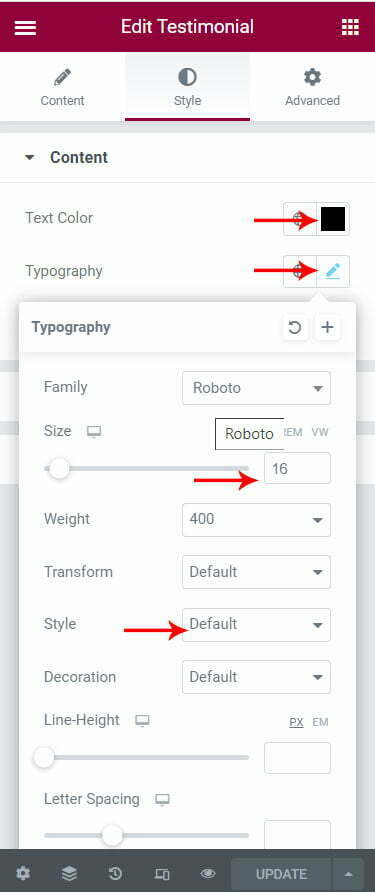
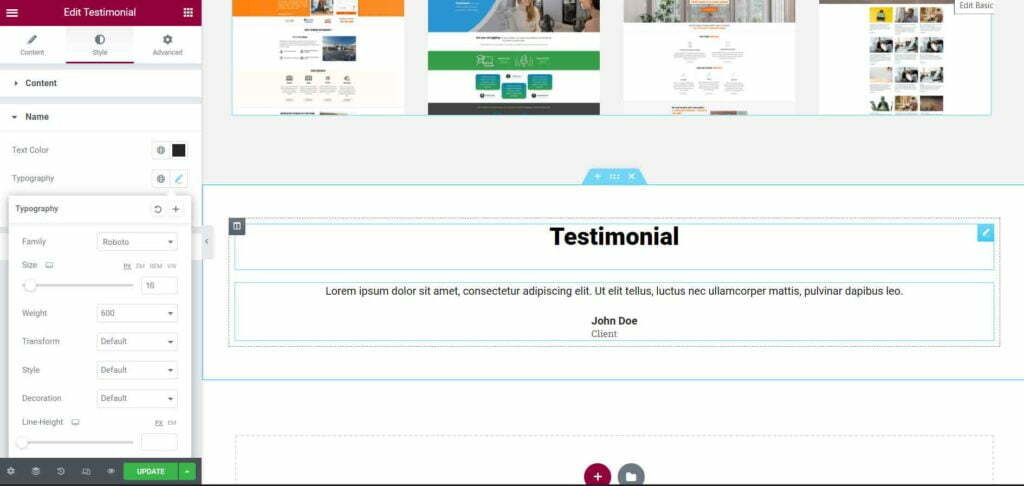
In the testimonial widget, there are several customizable options. you can change client descriptions, client names, title styles from the left side panel options
5.5) Call to Action
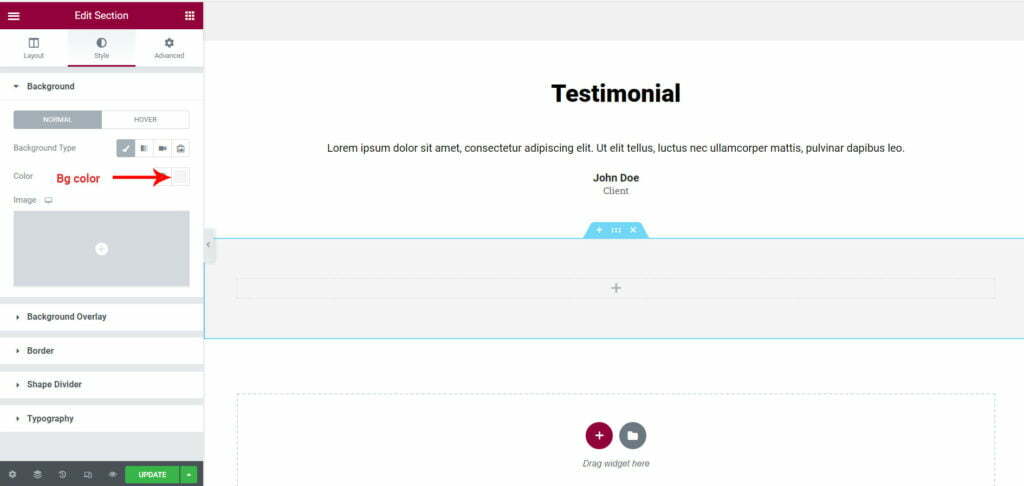
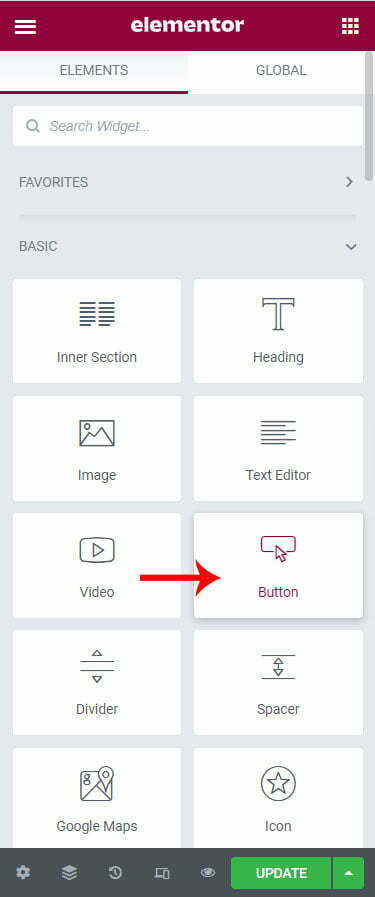
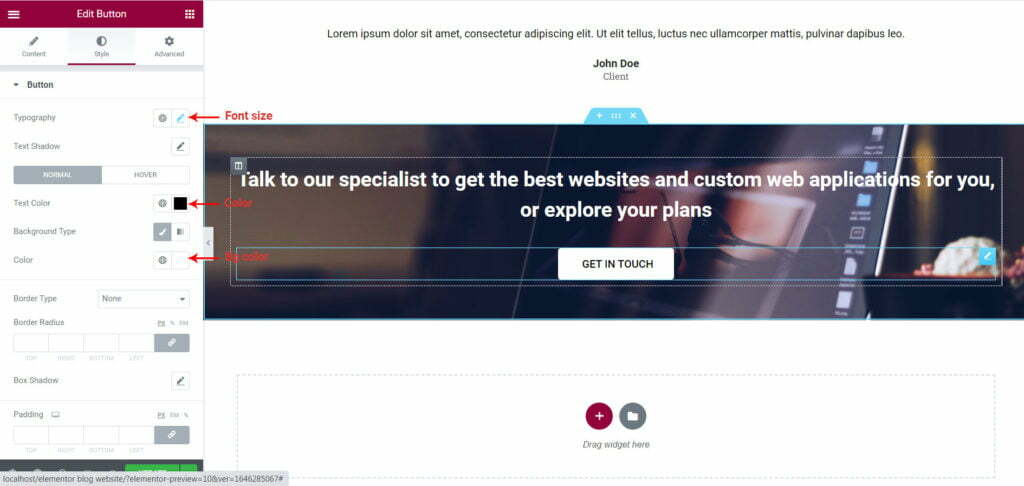
The Call to Action section is used to get quick inquiry details about your business needs. Here we are going to create a manual call to action button for a quick inquiry.
5.6) Google Map
Google maps help customers or website visitors know where you are located and save customers the steps of opening a new browser window, leaving your website and finding directions.
The elementor google maps widget is a simple way to embed google maps in your website. Let’s drag and drop to implement the google map location elementor widget from the elementor widget panel.
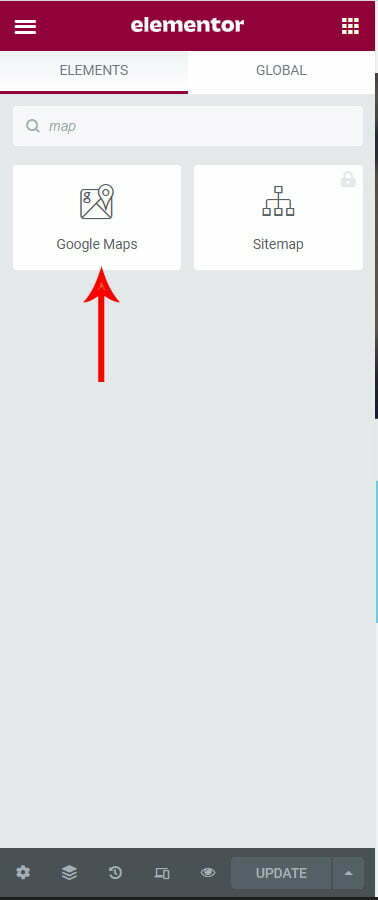
Let’s create a location map for a full-width single layout structure.
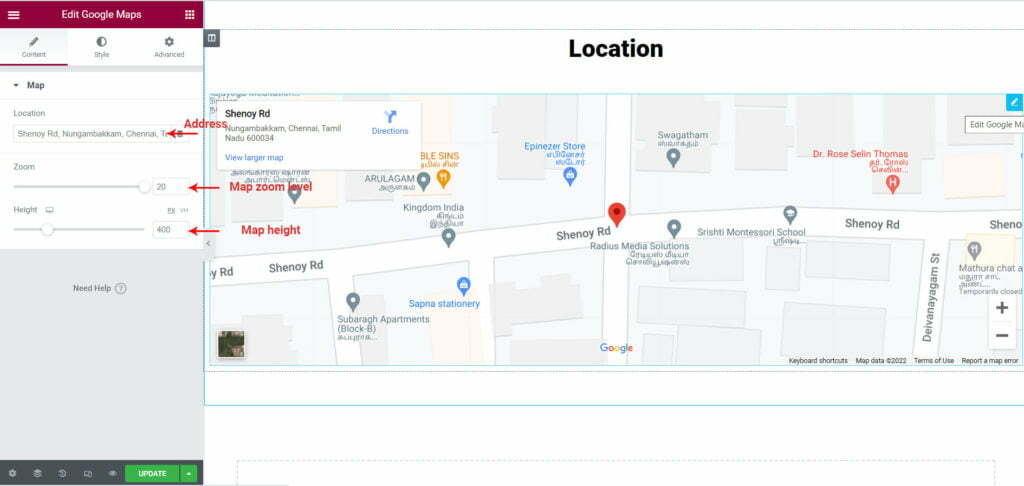
The map widget has an address field for your location, so you can mention your address details in that field, also you can change the map zoom level, map height from the left side panel content section
6. Create Footer section
Generally, the footer section is common for all websites, the website footer section is located at the very bottom of a web page. It contains contact details, social media icons, quick nav links, an email form, etc.
Let’s create a common footer section and footer bottom for our web pages. We need to install a plugin called Elementor Header & Footer Builder.
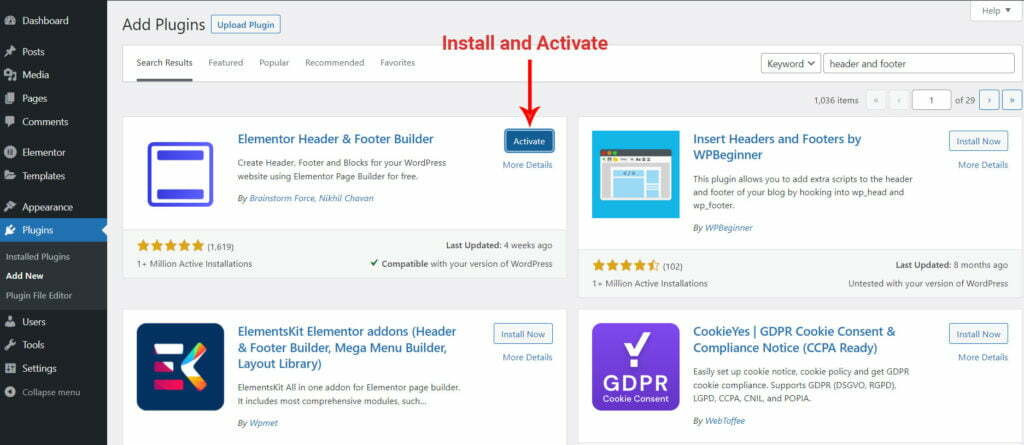
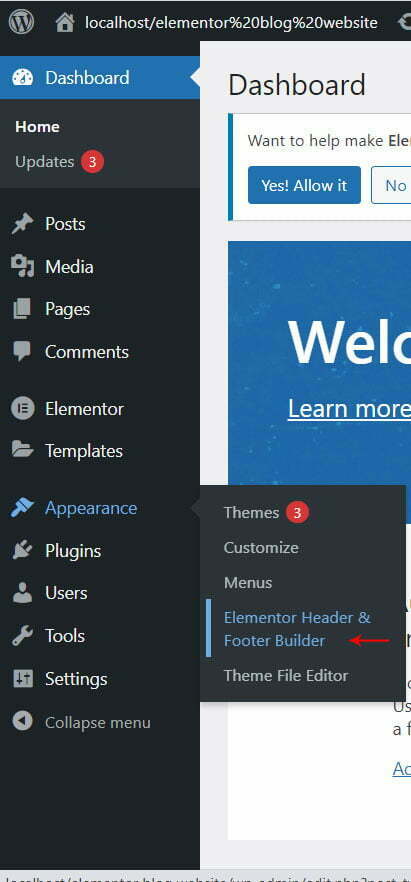
After installing and activating the plugin, navigate to the admin panel Appearance → Elementor Header & Footer Builder
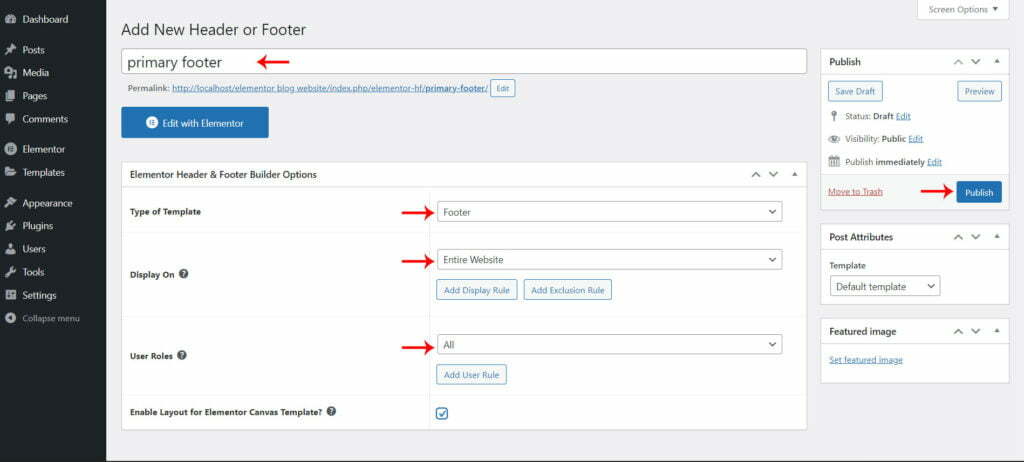
Next click on the “Add New” button on top to view the footer panel, then create the name of the footer, add the conditions, and finally click on the Publish button.
After publishing the footer click on the “Edit with Elementor” button. Now open the elementor layout structure panel.
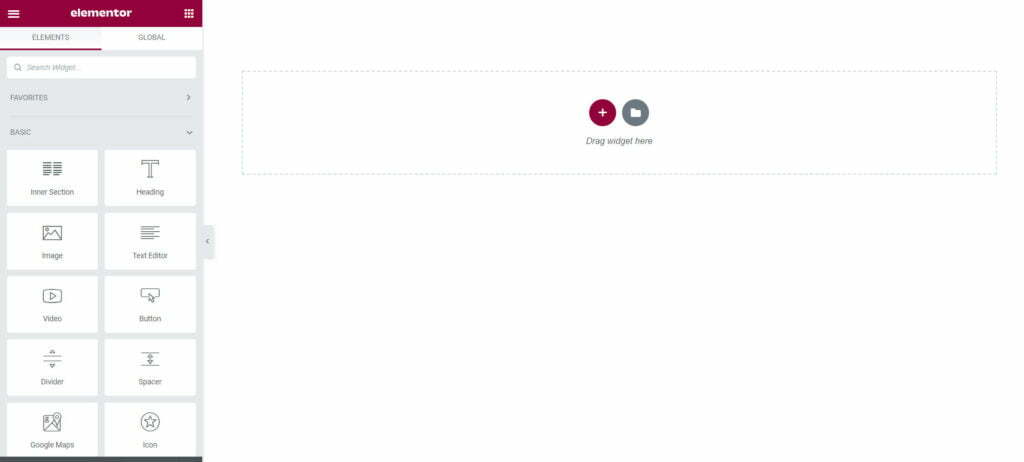
Next, create the footer layout structure for your website footer content. In this footer section, I have created three divided layout structures. This layout structure contains contact us, quick links, get in touch, and social media icons.
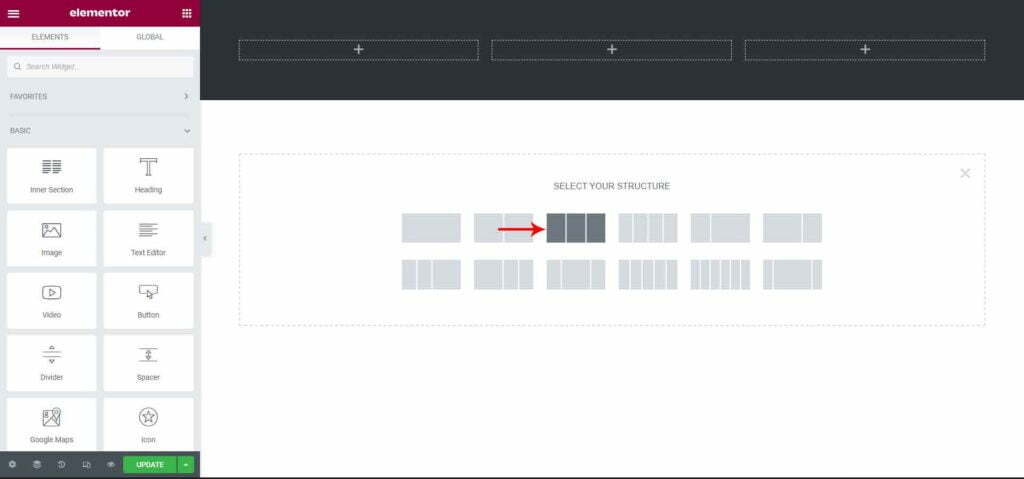
Next, we will create the title for three different structures using the title widget. The title widget also allows you to customize the title tag and font size, color, font family, font-weight, etc.
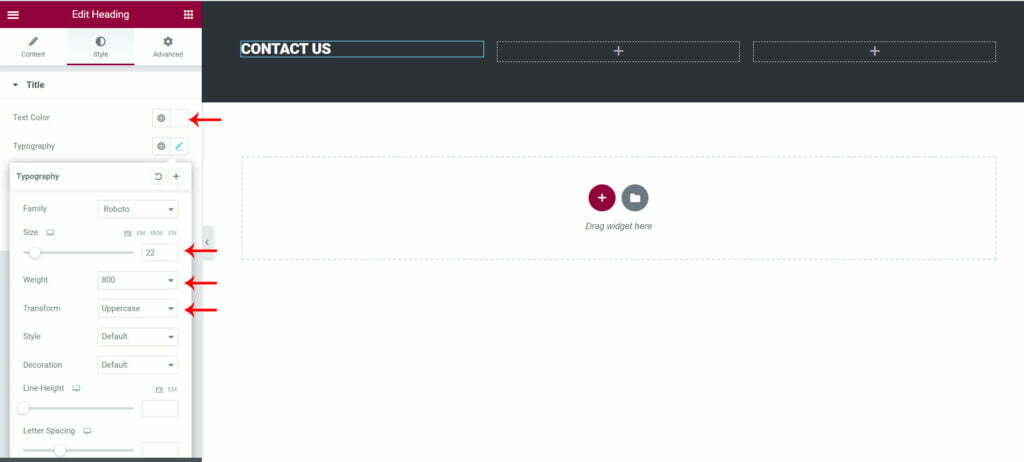
6.1) Address
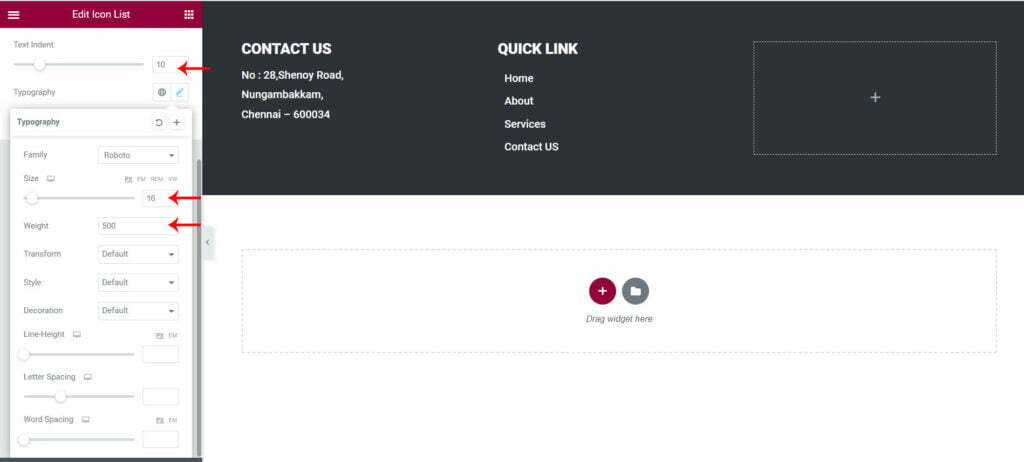
In the first column, create the contact address using a text edit widget. It contains font size, color, font family, font-weight, etc,
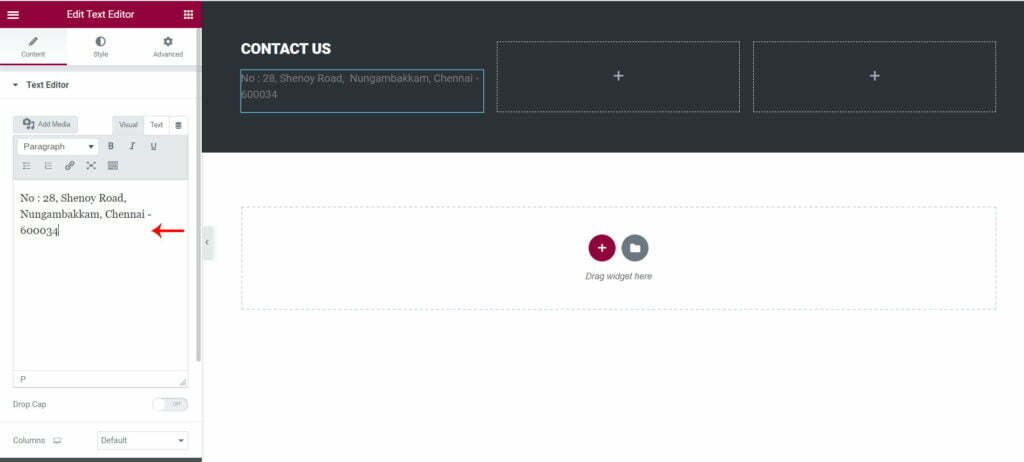
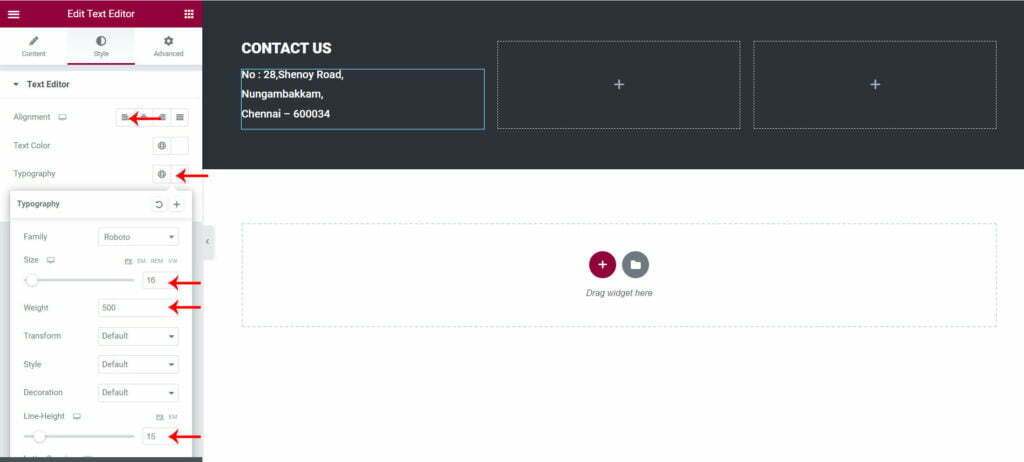
6.2) Quick links
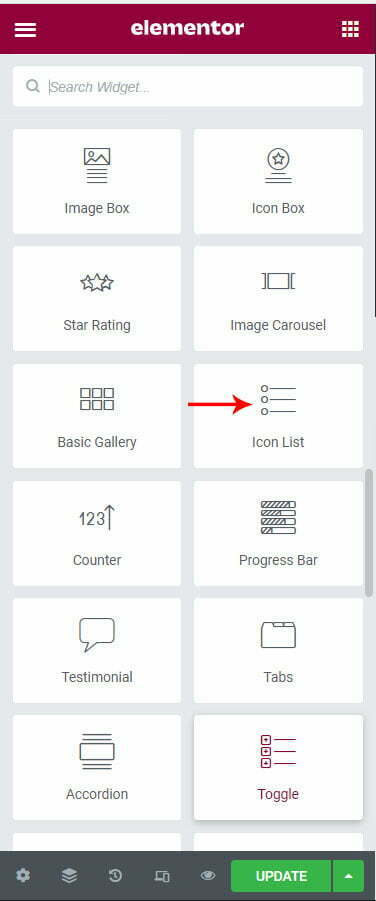
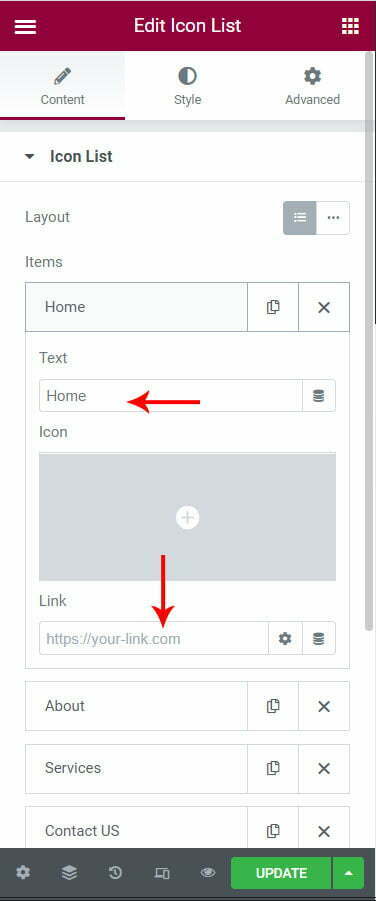
In the next column, create a quick nav link for pages. Using quick links you can move from one page to another easily. For the quick links, use the icon list widget, this widget has an icon with a label option, so you can choose your icons and label name.
6.3) Social Icons
In the third column create get in touch details for phone number and email id using the same list-icon widget. As I had mentioned in a previous topic about how to customize the icon list widget, here I added an icon with a label name.
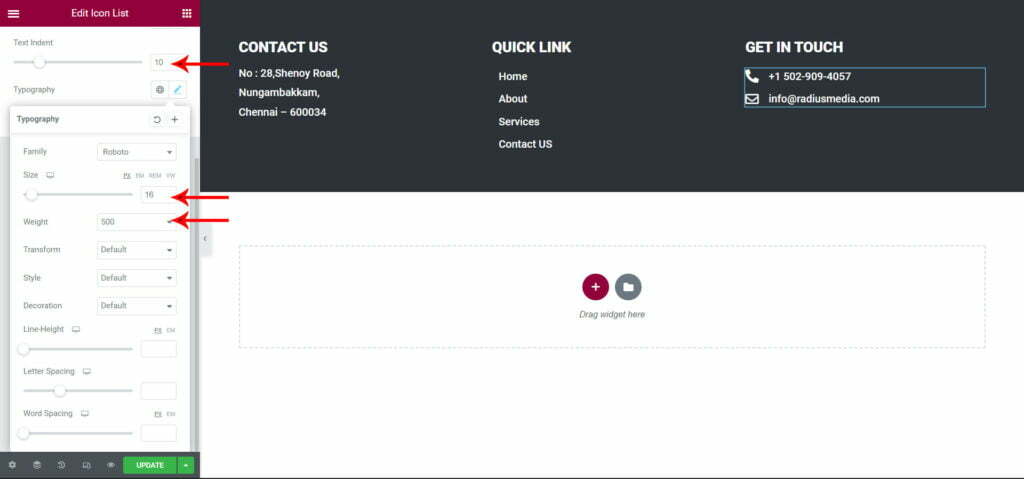
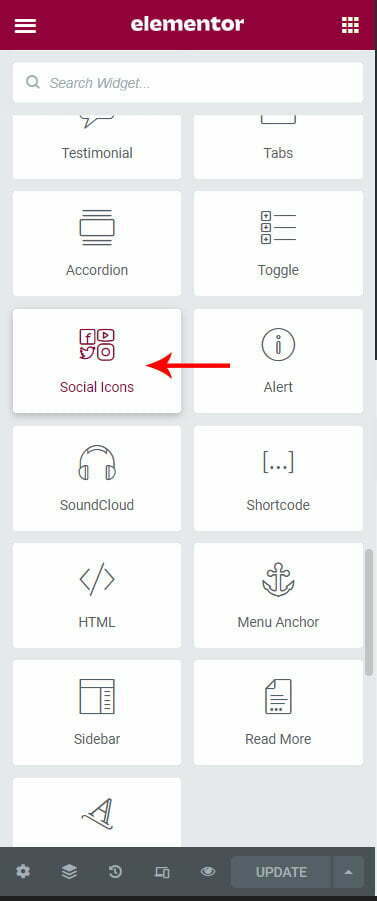
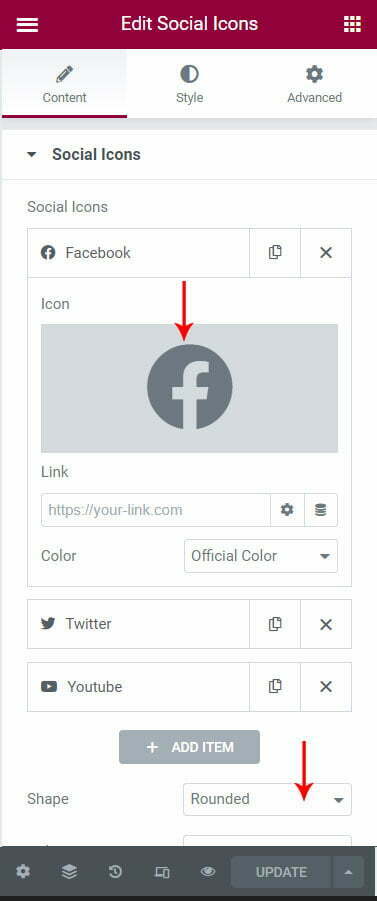
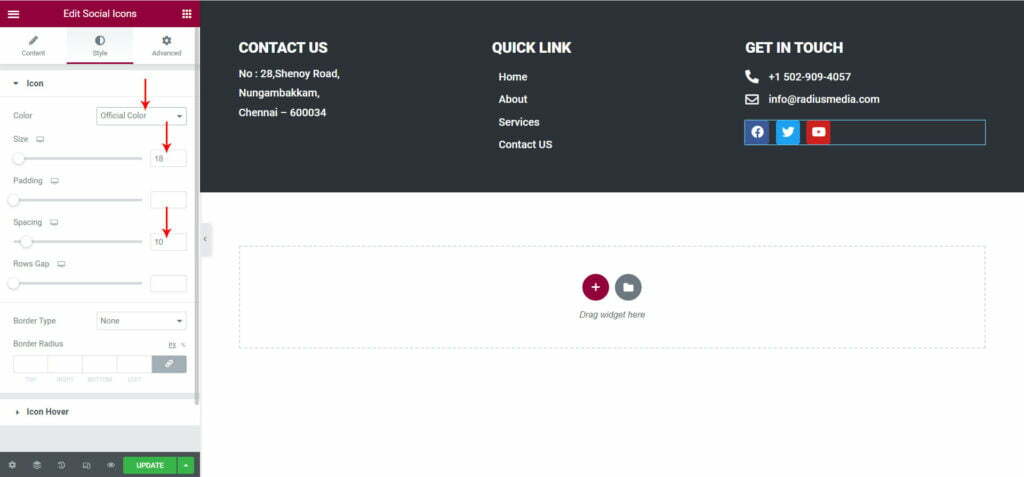
At the bottom of the get in touch section, I will create the social media icons for our website, using the social media widget from the elementor left panel, drag and drop the widget and customize the following screens.
6.4) Create Footer bottom(date stamp ©rights)
Footer’s bottom contains the date stamp & copyrights. In footer contains information that improves a website’s overall usability.
Create a footer bottom as the design needs under the footer section in the following steps:
First, create the single-column layout structure and give some background color for the layout
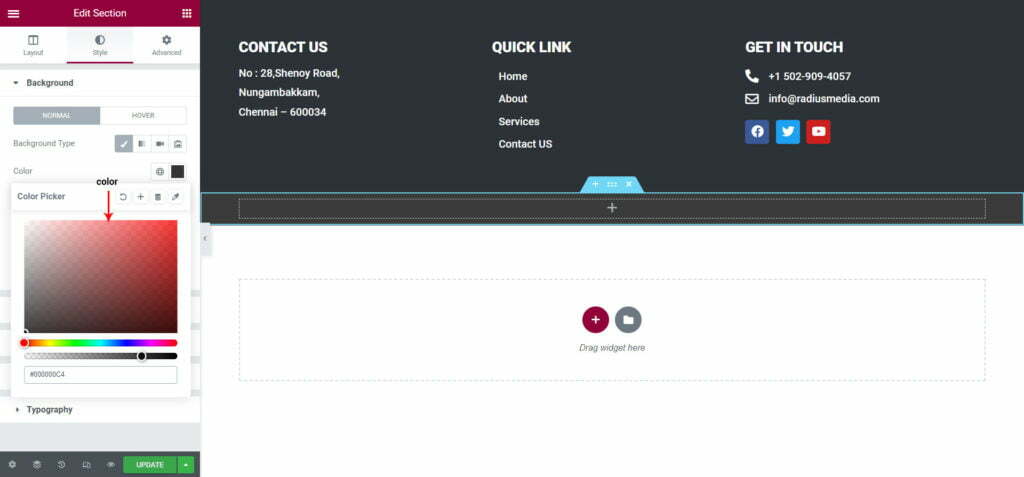
Next, create the date stamp & copyright date using the text editor widget and style it from the left style panel option.
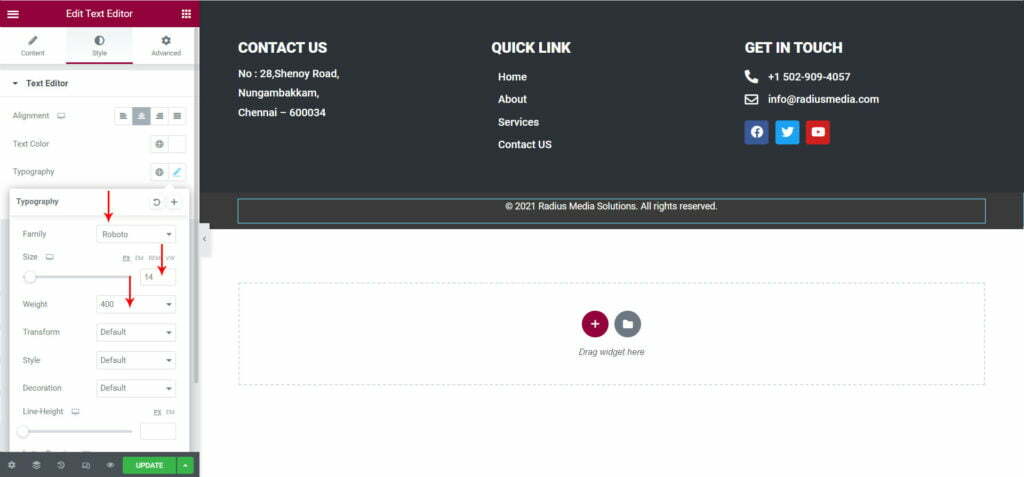
Finally, we created our website homepage using free elementor widgets. This is how to design your best elementor websites.
Conclusion
Hope this blog article helps you on how to create the best elementor websites with WordPress using the elementor plugin. Elementor is the best page builder to create a website, while you can use the free version to create a basic website or use the Pro version to create stunning complex websites it gives you access to more widgets and templates.
No programming knowledge is required, simply download and install the elementor plugin onto your WordPress, choose your desired theme, customize, and publish.
To know more about CSS, Angular, Elementor, and other design-related kinds of stuff visit our Blog.
