Introduction of Woocommerce Website
Woocommerce is a free eCommerce plugin that allows you to sell anything, beautifully. Built to integrate seamlessly with WordPress, Woocommerce is the world’s most popular eCommerce platform. With WooCommerce, you can sell both digital and physical products.This article will show you how to set up a simple WooCommerce Store Step-by-Step.
Ocean WP Theme Setting up
To Install the OceanWP theme follow the 5 simple steps mentioned below.
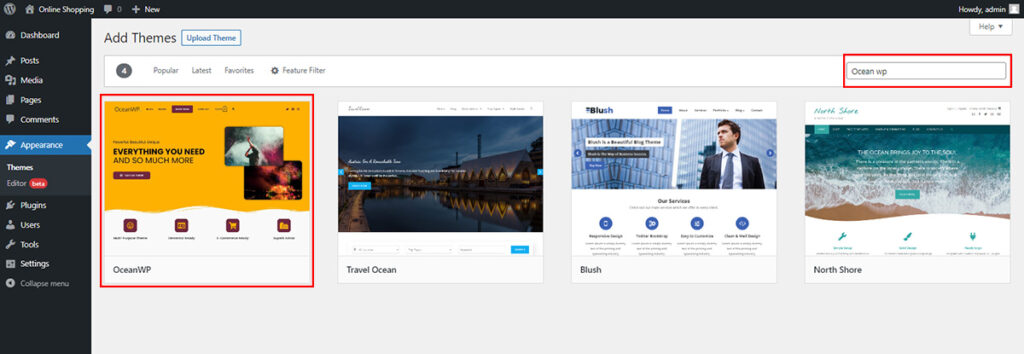
- In your WordPress dashboard, go to Appearance > Themes.
- Click the Add New button.
- Type “OceanWP” into the search bar and press the Enter key.
- Click the Install button.
- Click the Install button.
Setting Up Header & Footer menu
To create WordPress Menu follow the 4 Steps mentioned below.
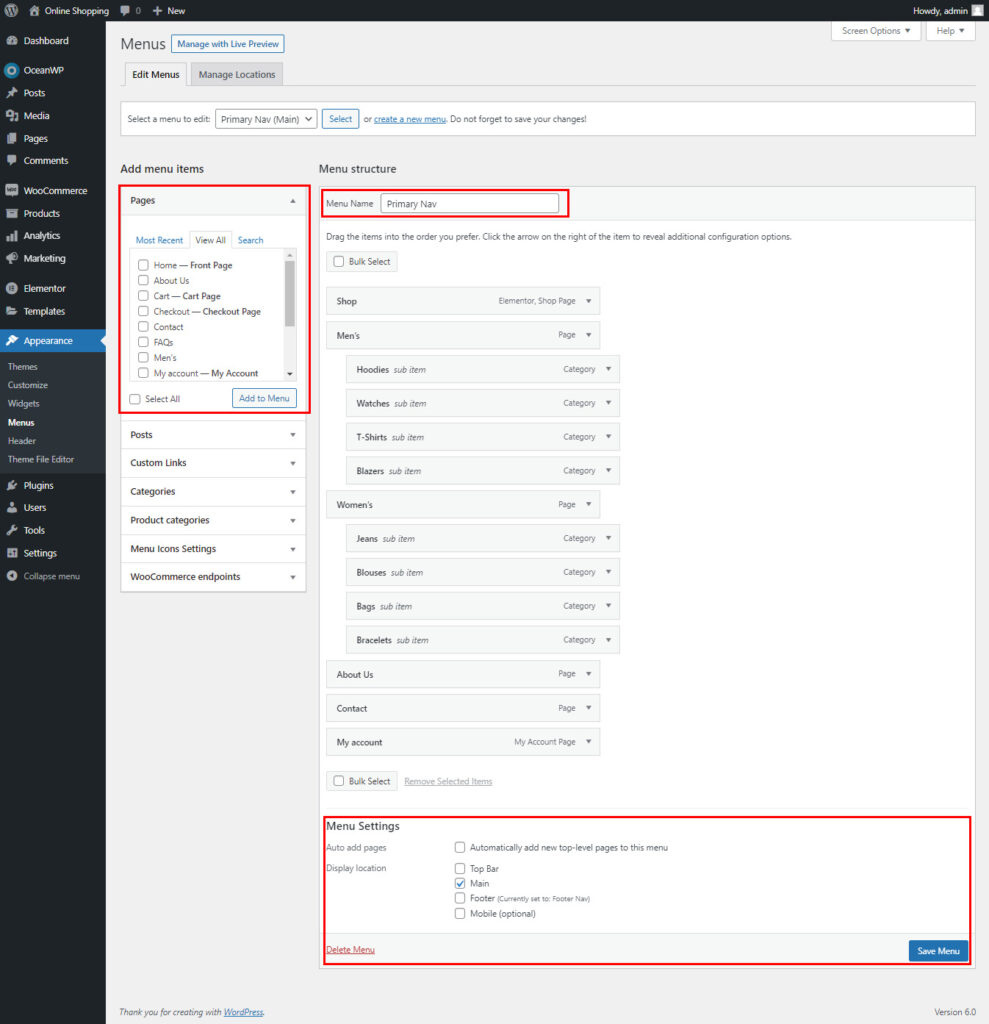
- In your WordPress dashboard click on “Appearance” and then “Menu” in the left-hand column.
- To create a new menu, enter a name for the menu in the “Menu Name” field and then click on the “Create Menu” button.
- To add items to the menu, click on the “Pages” link and then select the desired pages from the list. Alternatively, you can add links to other websites by entering the URL in the “URL” field and then clicking on the “Add to Menu” button.
- Once you have finished adding items to the menu, click on the “Save Menu” button.
Create the Home Page
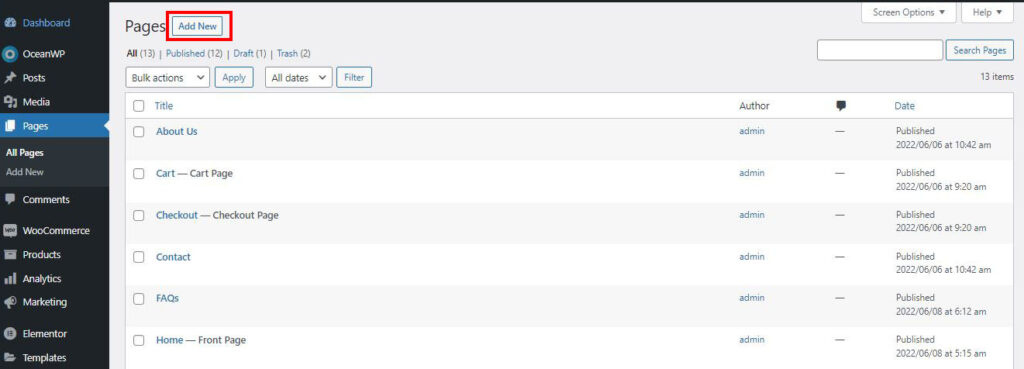
In order to create a new page in WordPress, you need to go to your WordPress Dashboard and then click on the Pages link in the menu on the left-hand side. Once you are on the Pages screen, you will see a list of all the pages on your website as shown in the screenshot below.
To create a new page, click on the “Add New” button at the top of the screen. This will take you to the Add New Page screen where you can enter the page name of your new page and click publish.
a) Create the Header
To create the Header follow the steps mentioned below.

- Go to Appearance > Customize.
- Select Header & General Tab.
- Under the General section, click on the “Style ” dropdown and select the style you want. On this website, we choose the “Minimal” Header.
- Click on the Publish button.
b) Create the Footer
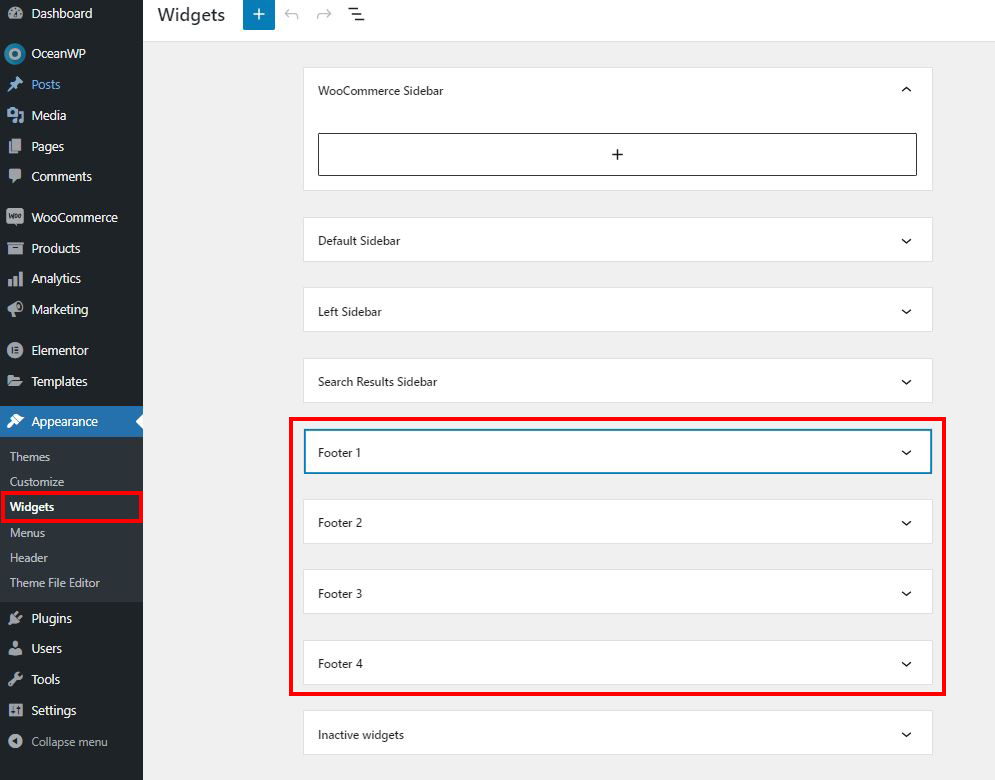
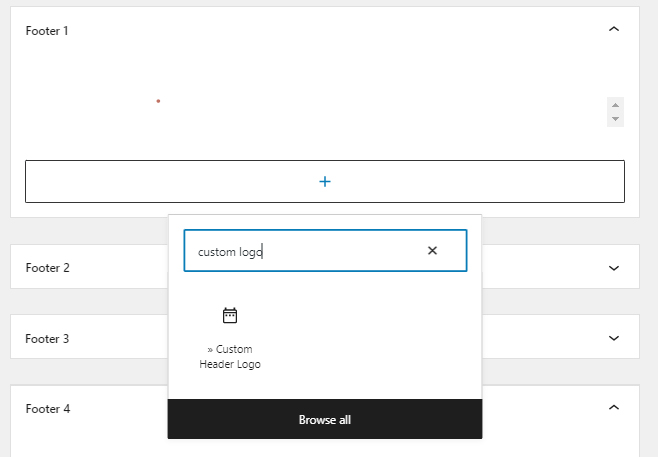
To create the footer In your WP Dashboard go to Appearance and widgets. Now you can see the four-footer widgets areas like the below screenshot. Click on footer one and let’s add a widget there in our demo site we have added four sections “Logo” “General Links” “Contact” & “Social Icons”
c) Create the content (Home Page)
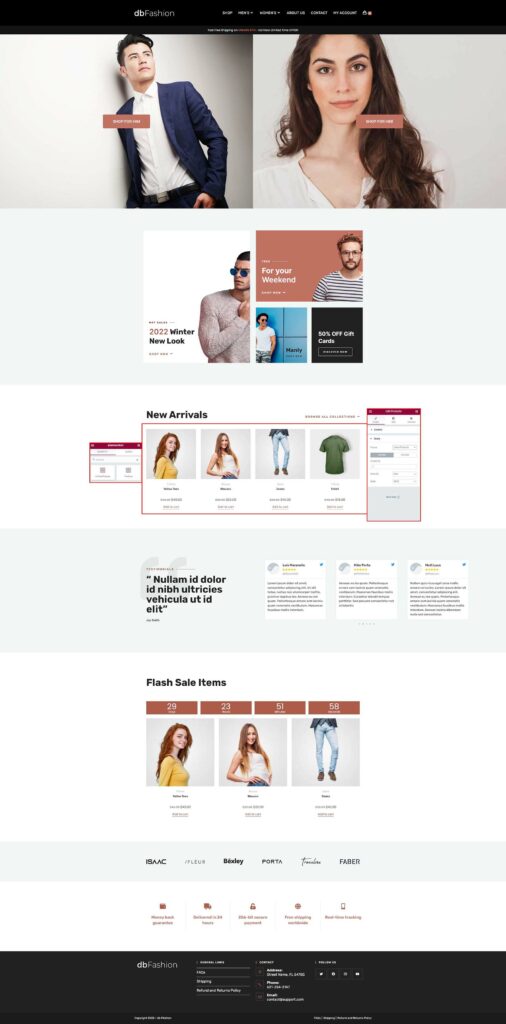
Next, you need to enter the content of your page. This can be done in the text editor but in this tutorial, we are using Elementor Page Builder. To know more about how to create Websites with WordPress using the Free Elementor Plugin check out this article. We have discussed the whole process of creating a basic Elementor Website with WordPress using a free elementor website builder.
Adding an Ecommerce Shop to the site
In order to add an eCommerce shop to the WordPress site, you will need to install and activate the WooCommerce plugin. Once the plugin has been activated, you will be redirected to the WooCommerce setup wizard which we discussed below.
a) Install & Setting up Woocommerce Plugin
To Install the Woocommerce plugin follow the steps mentioned below.
- Visit the Plugins -> Add New.
- Search for ”Woocommerce”.
- Install and activate the plugin.
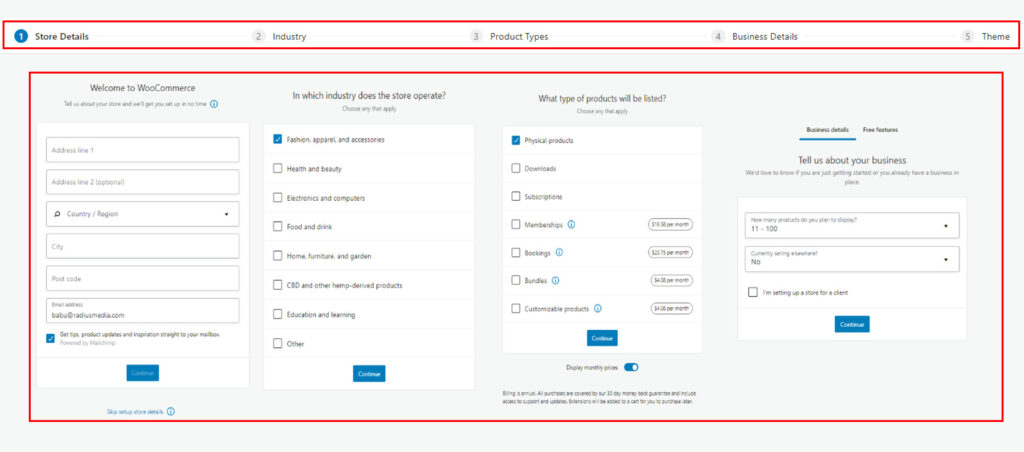
- Once the plugin is activated, you will be asked to set up some settings as shown in the Screenshots below.
- Enter your business information and click on the Save Changes button.
- Woocommerce is now set up and ready to use.
b) Create a Product Category
In WooCommerce, the category page is the page that displays a list of all the categories in your store, and the products within each category. Similar to categories on your posts in WordPress, you can add, delete, and edit product categories.
Categories are managed from the Products > Categories screen.
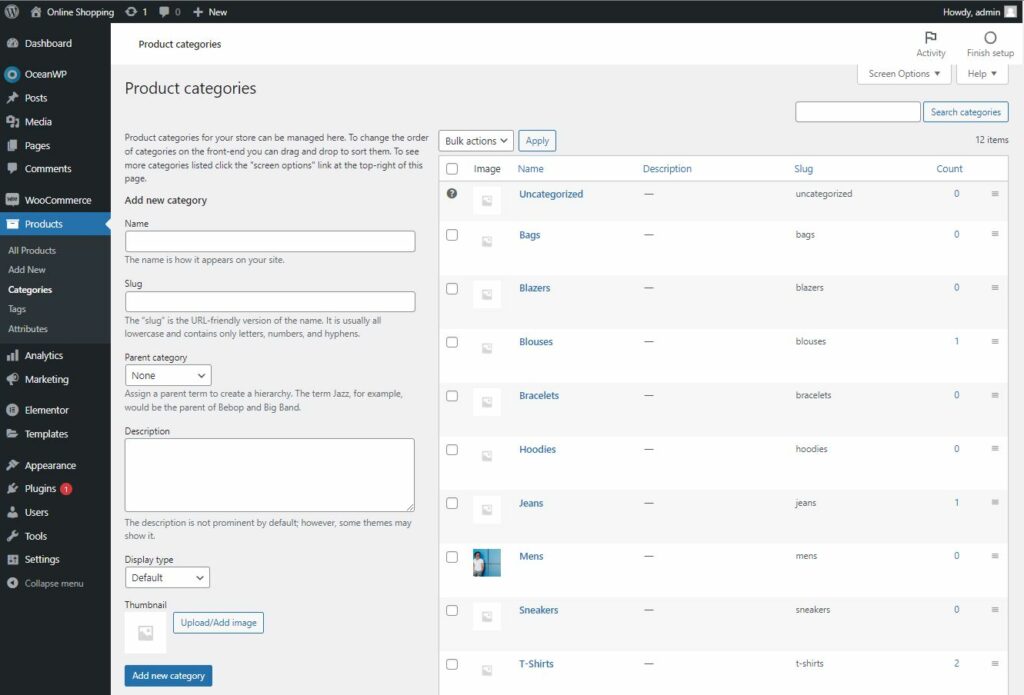
- Add a Name
- Add a Slug (Optional)
- Add a Description (Optional)
- Choose the Display type (It’s optional if you don’t select anything “Standard” use your theme’s default. “Subcategories” will display only the subcategories. “Products” only display products. “Both” will display subcategories and products below that.)
- Upload/Add Image (optional)
- After adding all the details click the “Add new category” button
c) Create a Custom page for category Archive
By default, WooCommerce creates the following new pages: Shop, Cart, Checkout, Shipping & Payment, and My Account. If you don’t see these pages you can generate these pages by simply navigating to Woocommerce > Status > Tools Tab here you will see the text “Create default WooCommerce pages” just click the Create Pages button that’s it.

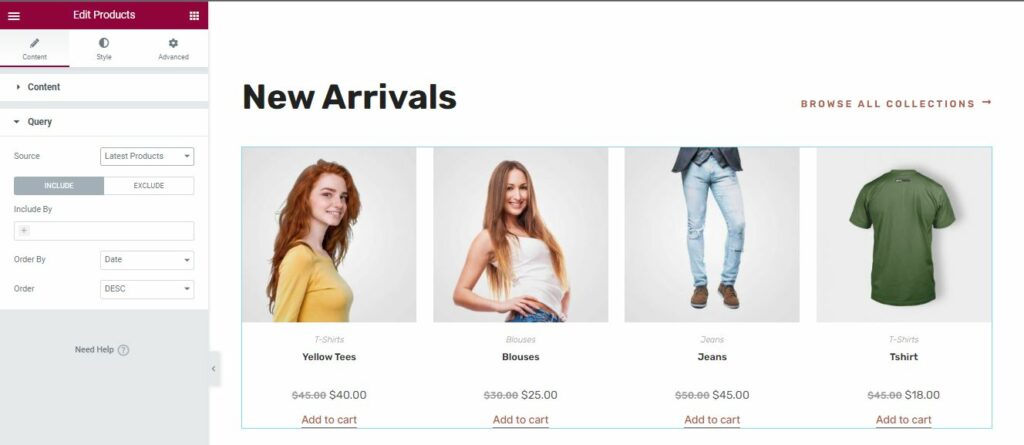
For the category page, we’re going to use Elementor to create a Custom Category Archive to show all the products we created for this demo site. To do this follow the steps below.
- In the WordPress admin panel, go to Elementor > Theme Builder > Products Archive Tab and click the Add New button.
- In the Choose Template Type dialog that appears, select Product Archive and click the Create Template button it will redirect to elementor page.
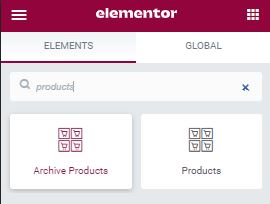
- In the Elementor editor, drag and drop the desired widgets into the archive template.
- Once you are finished editing the template, click the Publish button bottom left.
Download our Free WooCommerce Site
We have created a WooCommerce Website with Elementor Pagebuilder using the OceanWP theme. It’s a great starter template for your e-commerce store and it’s totally free. You can visit our website to download and also to know more about what we have included in this website template.
Conclusions
WooCommerce is a great eCommerce platform with many features and plugins to choose from. In many ways, it’s one of the most flexible platforms available. However, it’s important to remember that WooCommerce is a WordPress plugin. This means that it’s dependent on WordPress and only works with WordPress websites. If you already have a website built on another platform, you can’t just install WooCommerce. That being said, WooCommerce is an excellent option for a new eCommerce website.
We hope you enjoyed this post. If you have any questions, please contact us.
